
Yeap! I have finished building my desktop, and my paint racks!
The truth to be said, I've finished some weeks ago, but couldn't post earlier and... I haven't finished putting my paints in my new paint pots until this friday! That was an epic and tedious work, I'll explain that later.
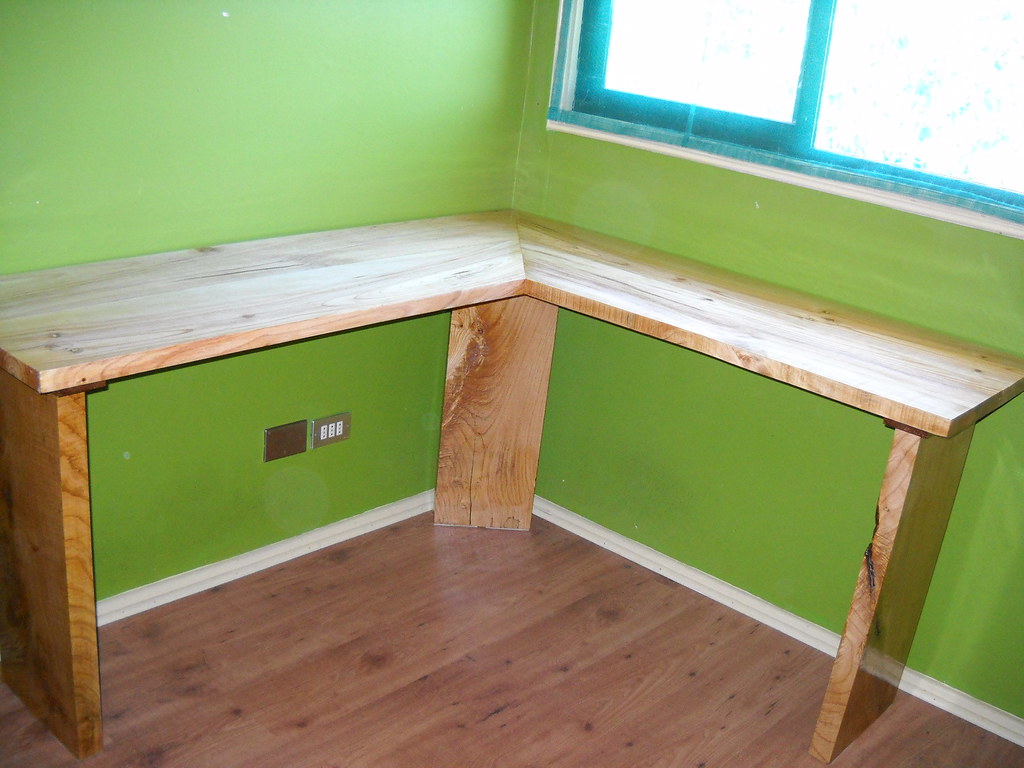
Now, lets look the building of the desktop (or the finishing part of it):

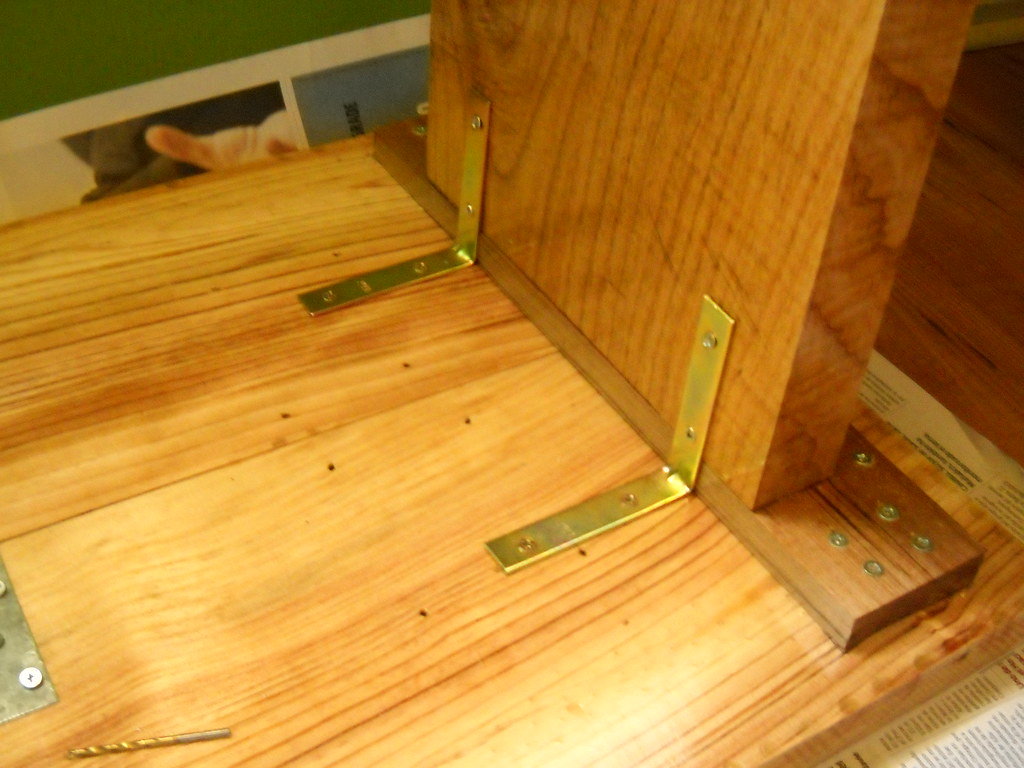
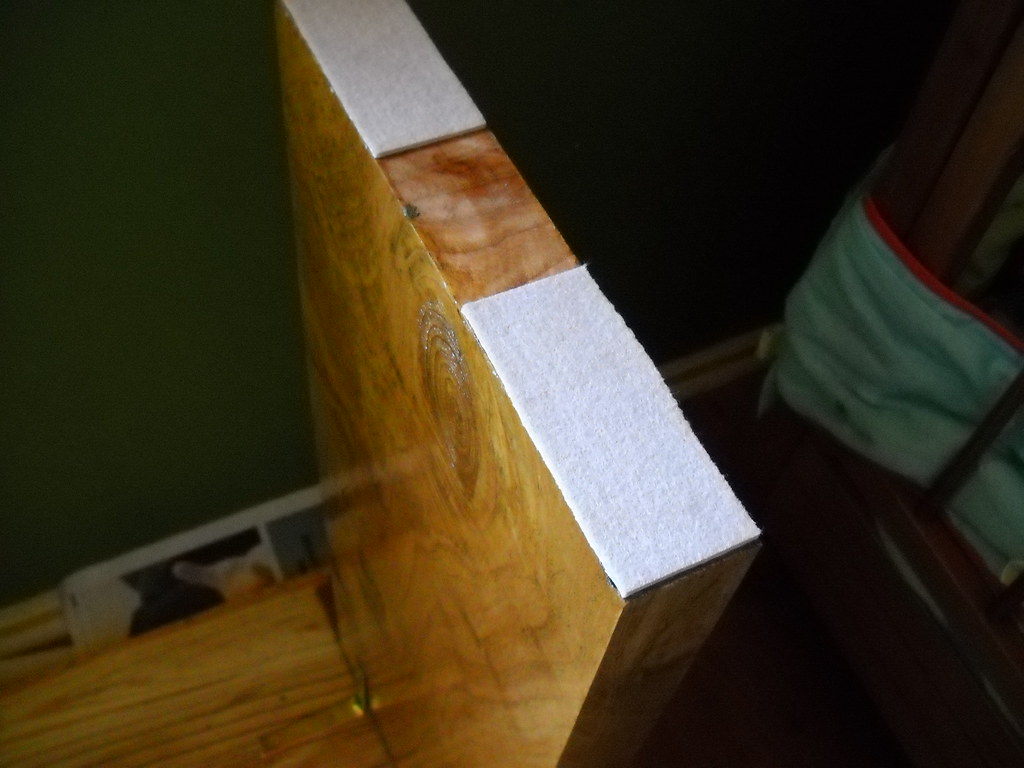
Just to reinforce, I screwed those metallic plates (no idea how to call them in english, neither in spanish xD) to the wood planks, just between them. There you can see how I attached the desk legs. A piece of wood and screwed to the leg. Then, the remainings of the piece of wood, attached to the desk. Then, added metal brackets to mantain (in the future) the 90 degrees between the legs and the desk. To finish it, I glued felt pads to the legs, in order to keep my laminated flooring in good shape.
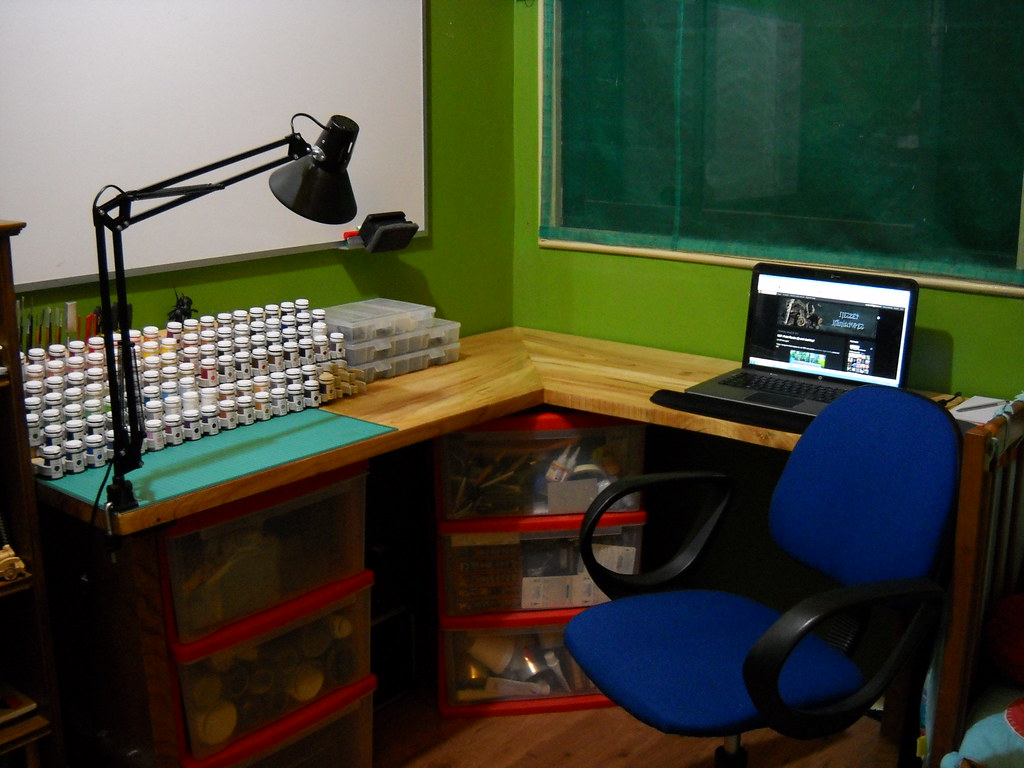
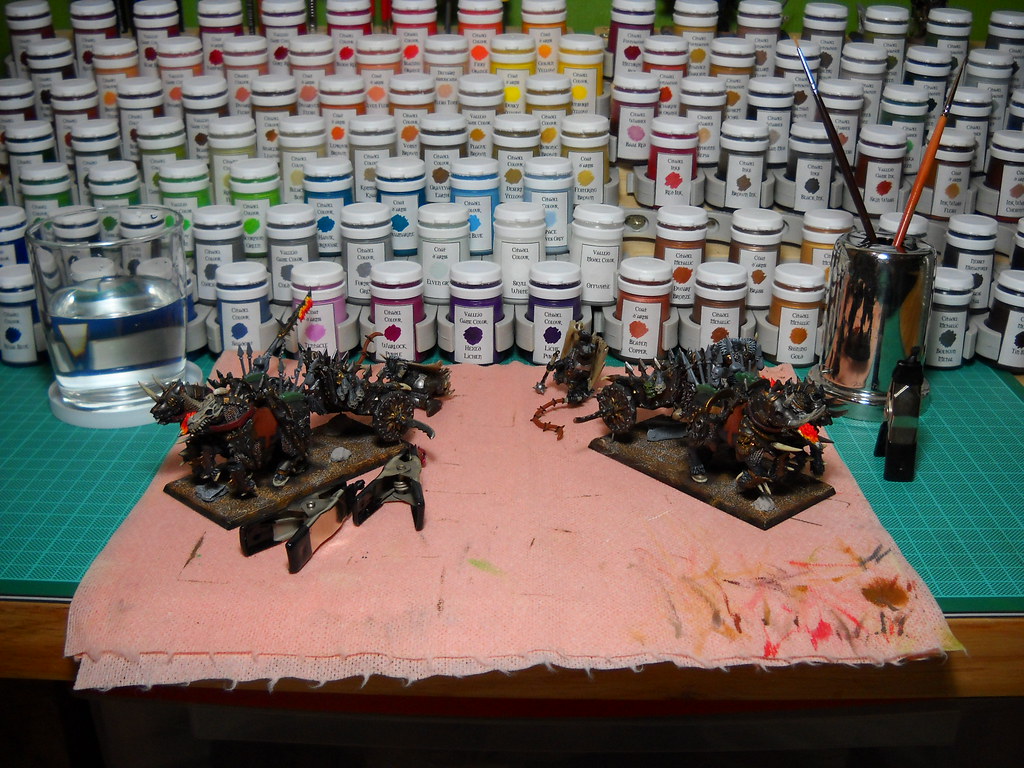
The finished desktop, ready to receive all my hobby and learning gear!
Well, for now, only my laptop counts toward the learning things xD
But in some weeks, there will be sure some files, printed powerpoint documents, papers, publications... >.<
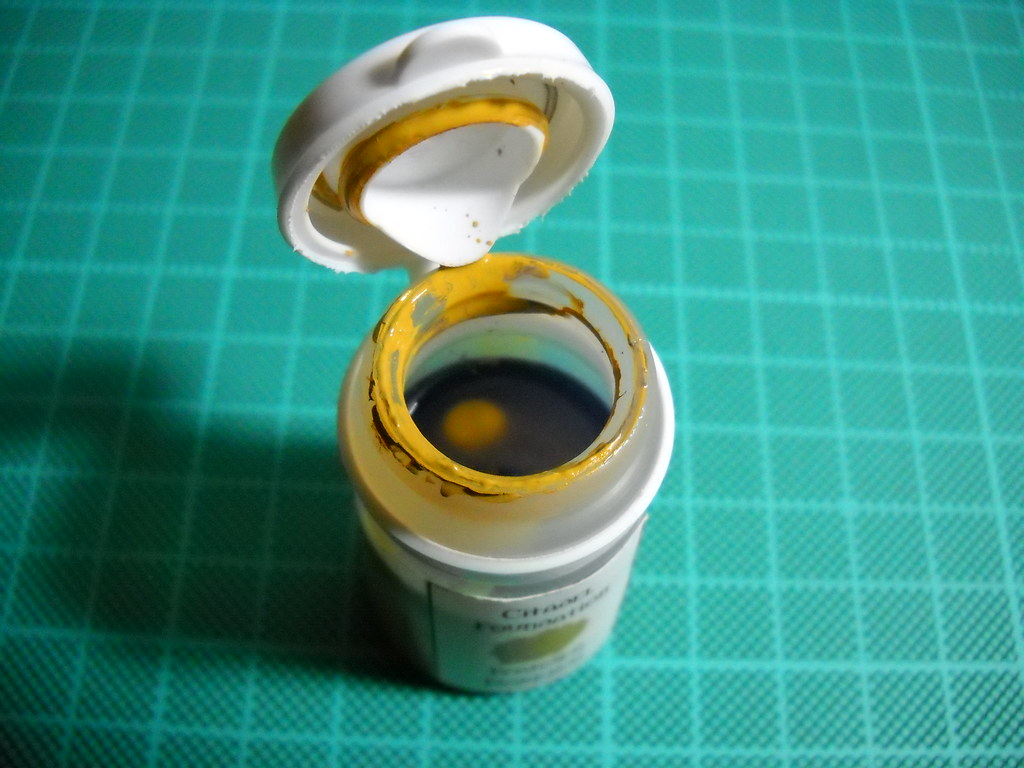
Coming back to the bright side, let me explain how did I put my paint into the Plysu pots.
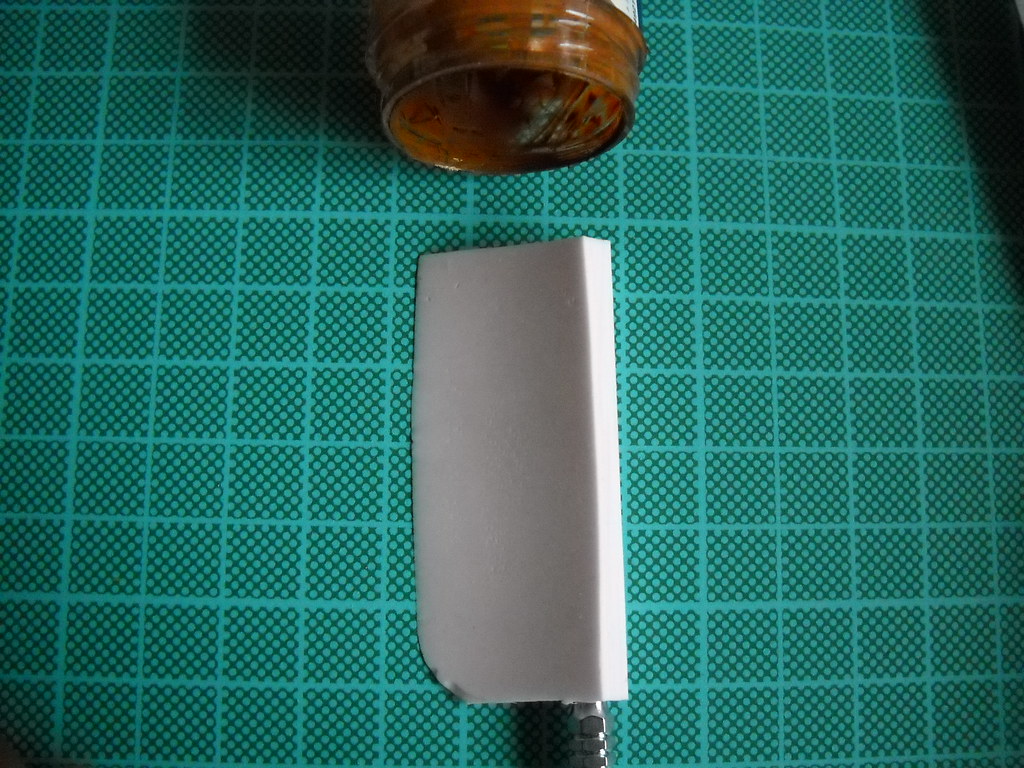
I was able to do that (without becoming crazy or dying while waiting) with a custom spatula I made.
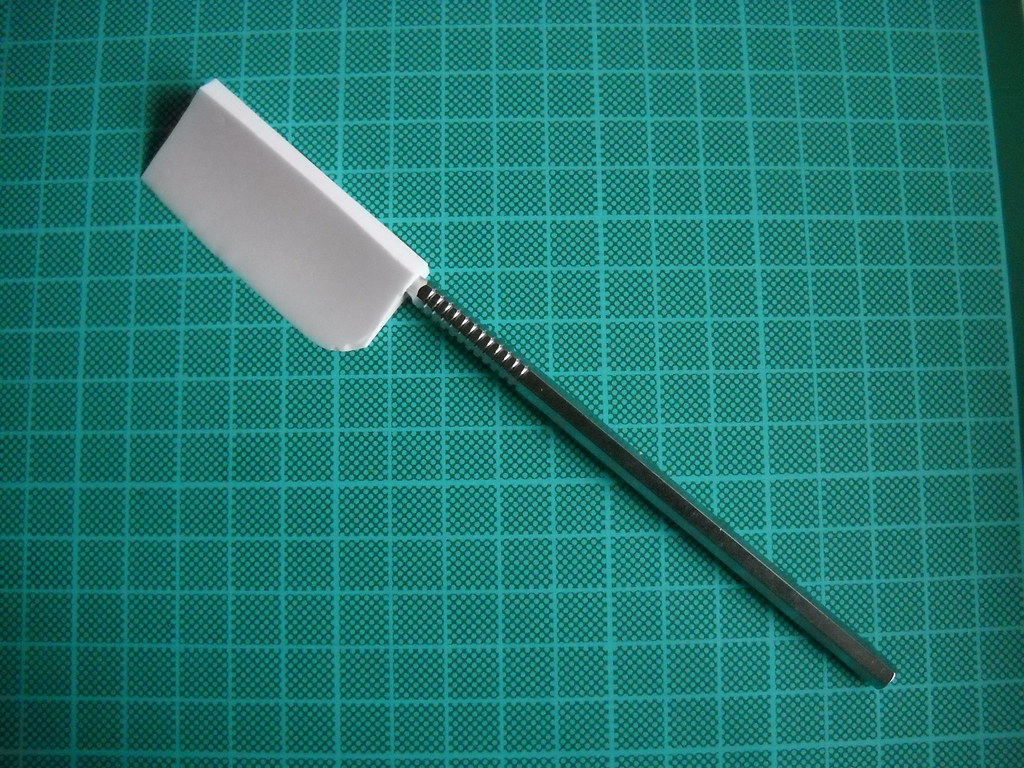

For the spatula, I used:
- an old dental tool, in bad shape (no longer useful, but still saved to "become something", "someday...")
- a dental silicone (better use the things you know, that's why I used that. Any RTV silicone or rubber should work aswell)
- a sheet of clear plastic
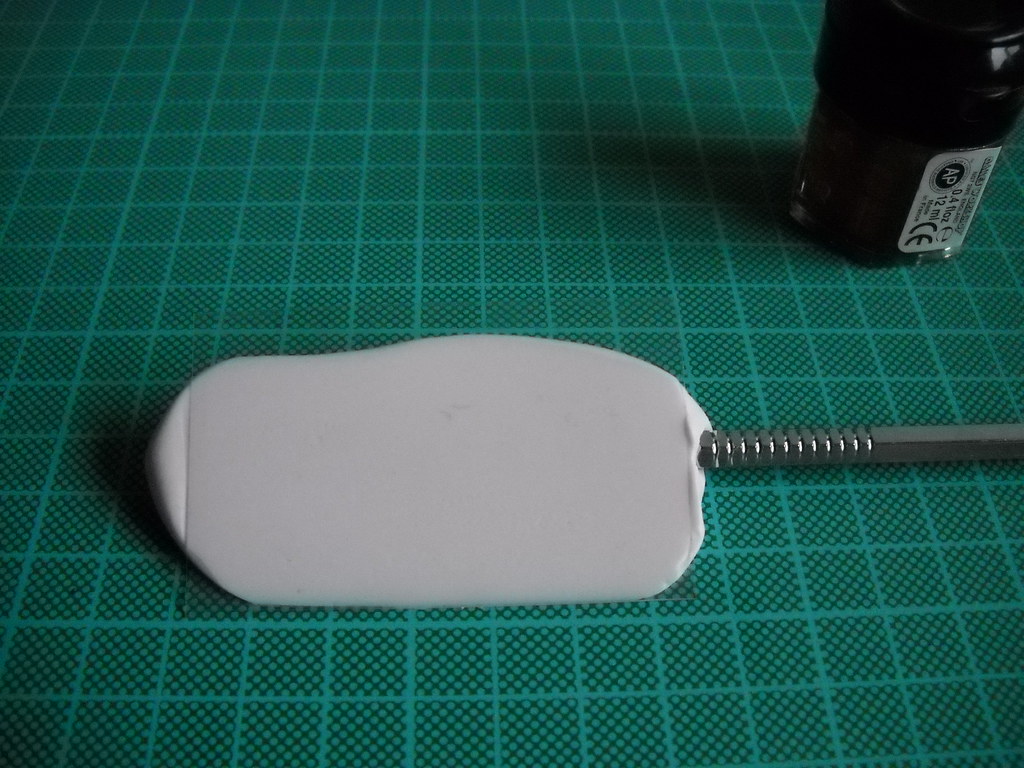
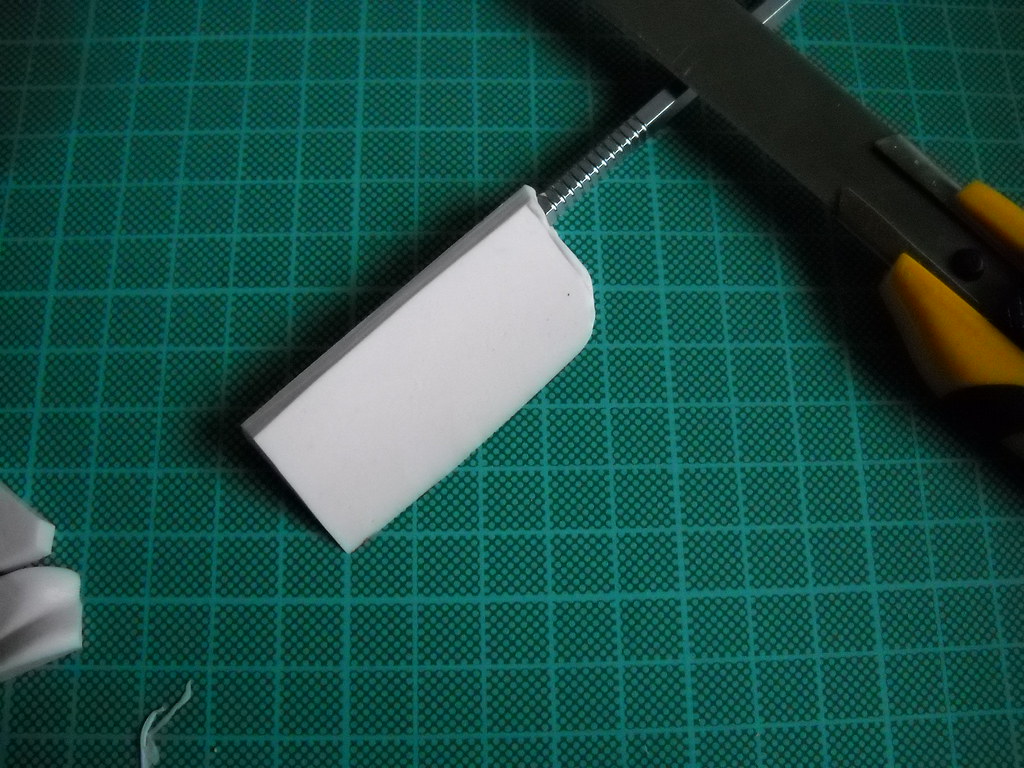
I just bended the end of the tool, to make it a bit more retentive. Mixed the silicone with the activator and formed it in the handle. Quickly, I press the silicone with the already-folded plastic sheet, to make the spatula triangular (and with a more regular surface; way better than cutting it after curing). When cured, I cut the excess with a knife and measured the spatula, to be sure that it wouls fit the citadel pots.
With the spatula in hand, I begin the almost endless task of moving the paints to their new home =3
(Is there a verb in english form moving a liquid to another container? I don't know any word for that, and recently I discovered that the word I use for this in spanish, doesn't legally exists xD)
The thing was, that I made the spatula thinking in the OOP screw cap hexagonal pots and that I didn't fit the new pots T.T
So, I had to improvise and use a leftover from the spatula making process to speed things a little. I made some sort of tripods using my pliers and clippers to hold 2 pots while I was removing the last drops of paint with the silicone leftover.
This was the most tedious part of this titanic task, so, I realized it in the first place. Then, I used the spatula and felt like a caveman with a wheel! It went easier, faster and lost almost no paint!
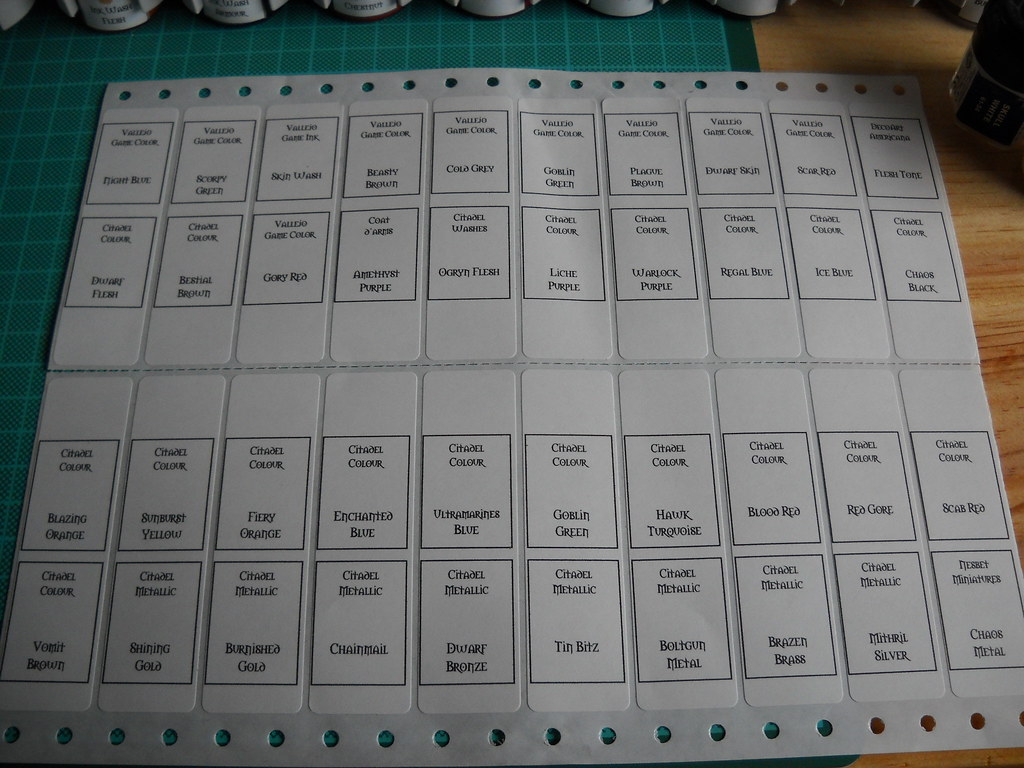
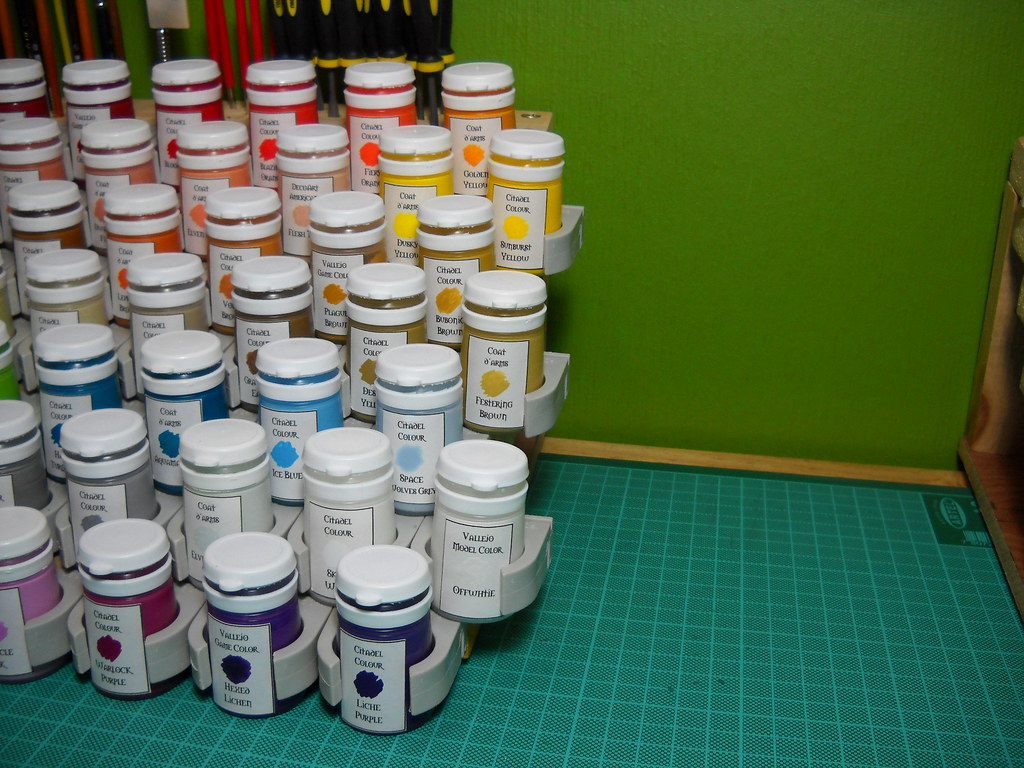
Well, in the meantime, I made the labels, like a caveman: using word and test-printing them until it fit the autoadhesive label-sheet I had avaliable (yeah, you can imagine me, printing and looking through the sheet if it fit the labels xD). When printed, I painted a spot on the labels with each color.
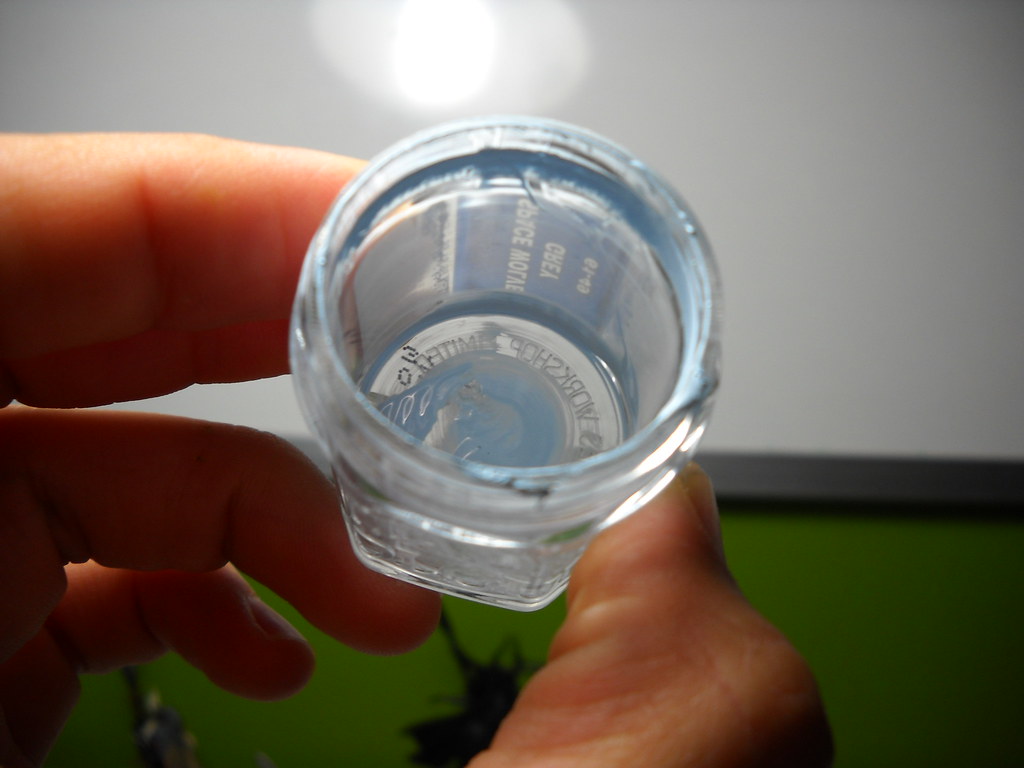
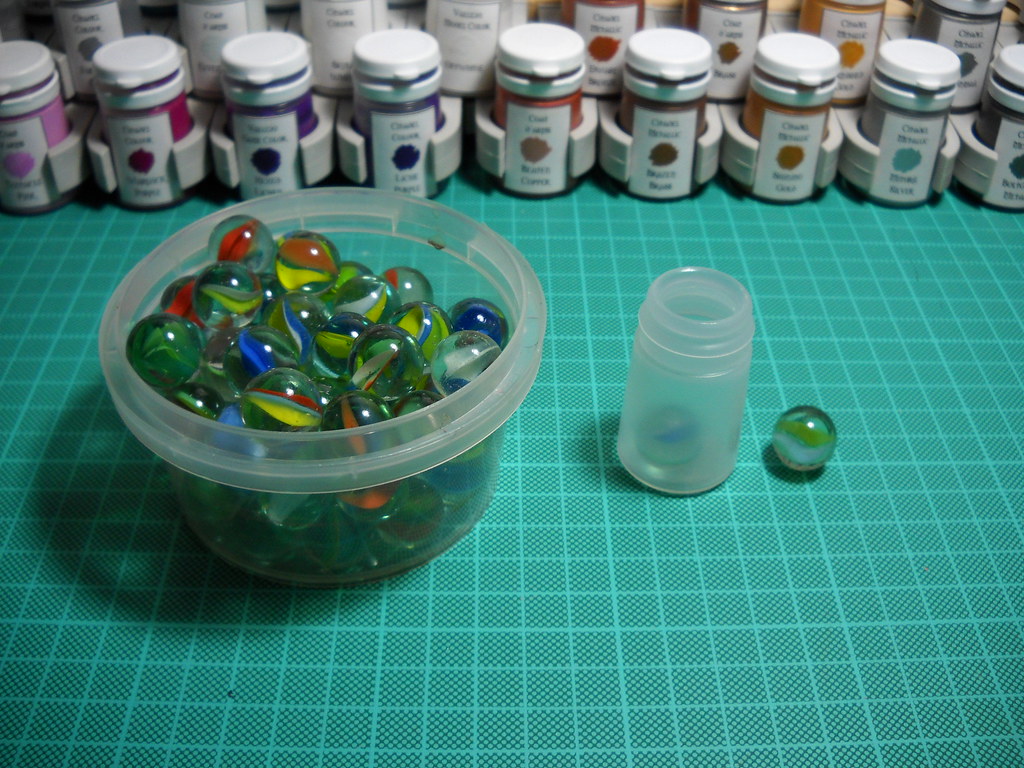
I also searched for my marble balls and made sure they fit correctly in the Plysu pots. I washed enough with boiling water and let them rest to cool down. The marble balls now became agitator agents for my paints. This is specially handy for those paints that come with their body almost lost, like some foundation paints, and the citadel metallic range.
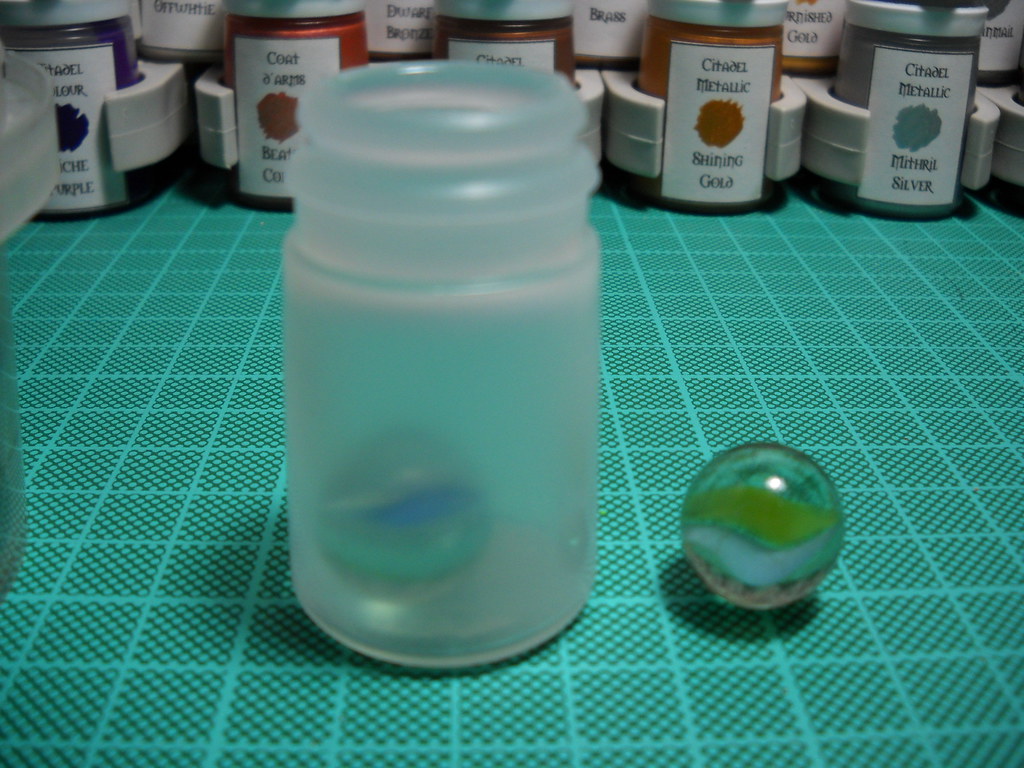
3 second shaking with the ball inside, and voilà! Seriously, agitators reduce dramatically the shaking time needed.

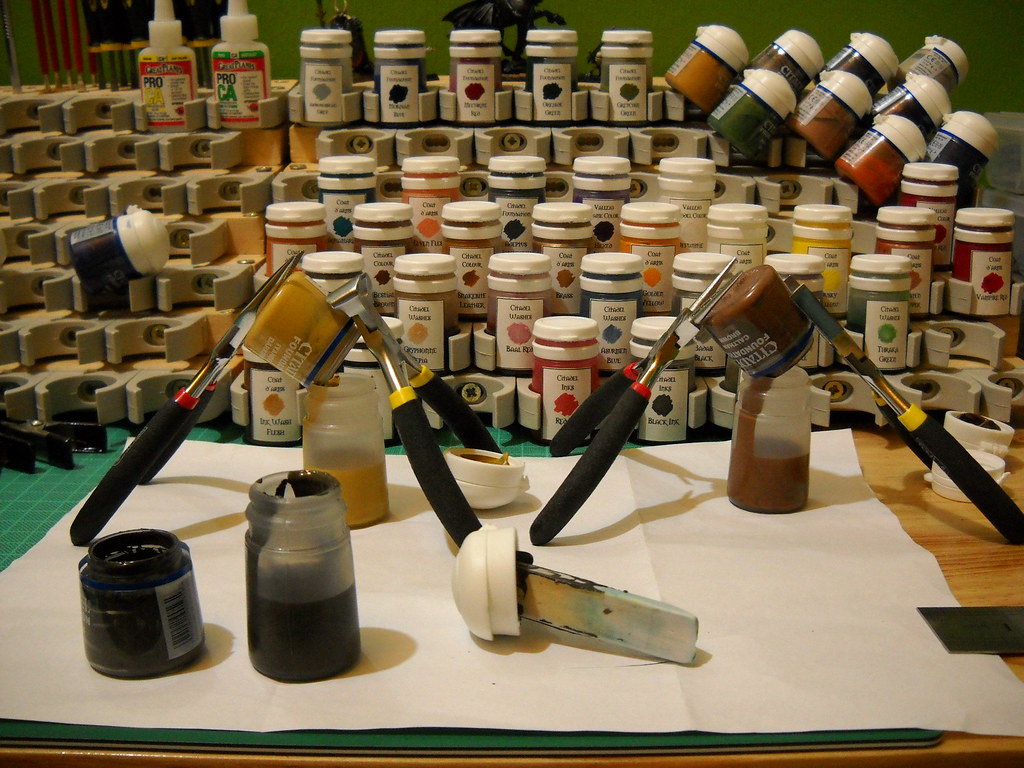
After all this work, I ended with this:

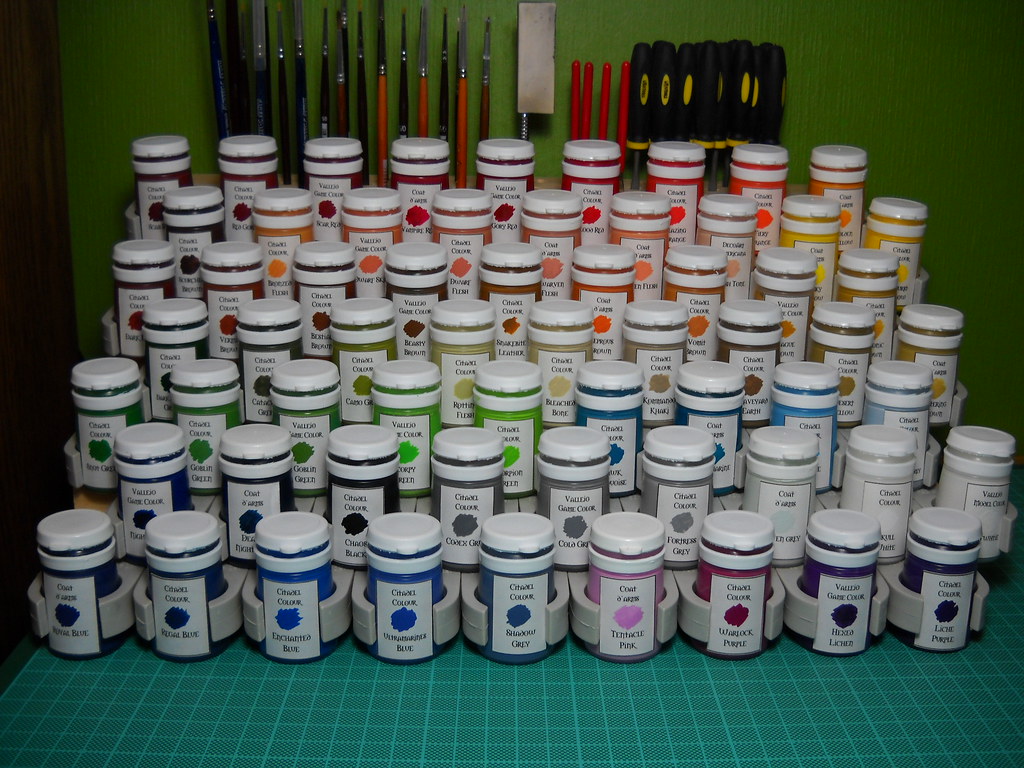

In the last minute, I decided to add pot holders in the 2nd, 4rth and 6th ranks, to fill the gaps between racks.
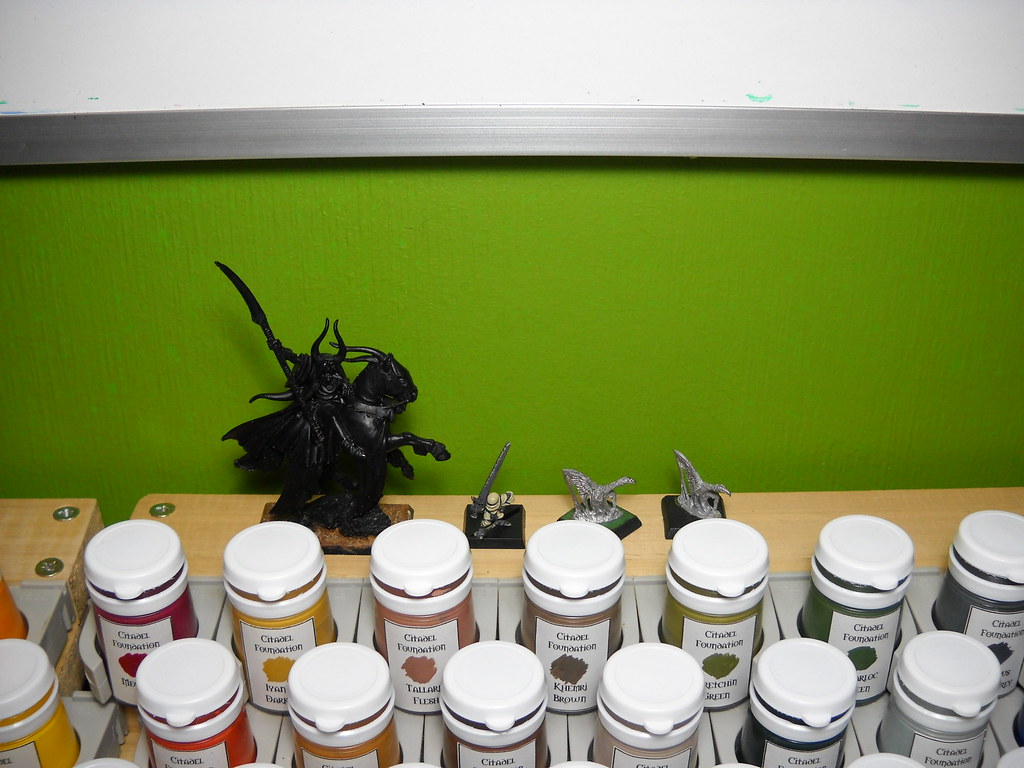
You could also see the font I used for the labels ;) And also, you can see that I followed PapaJJ's advice and left the upper rank without holders, to have some inspirational and WIP miniatures there.
Well, I forgot to make more pics, but I hanged my whiteboard near the desktop and bought an articulated lamp, with an awesome energy-saving daylight bulb, and also, I upholstered the chair. Yeah, that blue chair is 13 years old, but it doesn't look like that now =3
Appart from everything that I said, I have been also working as painter, cashier and waiter (in events), upholsterer (my mothers idea after renewing the chair: upholster all the dinning table chairs!) and quite other things that I don't recall yet xD That's why I couldn't post earlier: it took my 3 nights to finish moving the paints to the pots (damn, I need that word!) and I wanted to finished that before posting.
But, I have still almost a month to paint. I began trying to finish a pair of miniatures I tried to finish like a year ago. Those are now almost ready, and they will be for sure the first ones finished in my new desktop, and with my new racks!
PS: but... I still have some other projects to develop in the last month of vacations I have!
The metal plates would be brackets and I believe 'pour' is the other word you're looking for. As in, "I begin the almost endless task of pouring the paints into their new containers." (And it just now dawned on me why your writing seemed just a little off when i read your posts. Dunno why it didn't occur to me that English wasn't your native language ^.^;;
ReplyDeleteAnyway, your workspace is very nice! Mine's just kind of jammed in where ever it'll fit on a given day.
Dude, your a madman! All those paints into new pots!
ReplyDeleteLike the new desk though.
@oniakki: Damn! The thing is, I know the word verb to pour, and also how to say it in spanish! Yesterday, it took me like an hour to write and upload all the pics together and couldn't remember it, neither in spanish xD
ReplyDeleteAnd yes, English it's not my native language. It's spanish, then I begun learning German when I was 6 years old, and English when I was like... 12 years old!
Thanks for your comment!
@The GunGrave: Dude, and your'e not considering the task of getting those pots xD Freaking british didn't want to sell me the pots, because of my location! Thank you for your comment! ;D
Argh, us Brits can be a bit stuck up sometimes! lol!
ReplyDeleteWas the first time having trouble when buying to british people though; I love Royal Air Mail (cheap, the fastest and safest) it has taken only 9 days for some products to arrive home, from the UK =D
ReplyDeleteJust saw your link on Warseer. Lookin' good! Glad you managed to get some of those pots - how did you manage it?
ReplyDeleteThanks to you, Vermis!
ReplyDeleteSeriously, I couldn't make the fellas from the web you pointed to me to send me the pots to Chile, so I made my students-exchange-sister in Germany bought them for me, and send them from Germany with some other things =D
Couldn't have get my hands on these pots without her help!
And yours, thank you for telling me about that webshop ;D
wish i had the time and inclanation and space to build this type of set up :P that is sweet stuff buddy!!
ReplyDeleteThanks for the comment buddy!
ReplyDeleteBefore this, I have no more than my 2 storage cabinets. And had to setup everything before painting, so I used to spend more time setuping than painting xD And for space... thrown away my television, and used my bedrooms corner ;D
Also, checked your marines! Also some neat stuff!!
Man, you are HANDY. This stuff is really awesome. All of it... I really should do this....
ReplyDeleteThank you Jon, I hope this motivated you enough to make you start buiding and doing something alike for yourself! I really would like to see it when finished!
ReplyDeleteCheers!
Wow, I'm pretty sad that I don't own a house right now, because that would be the setup I'll do for painting my miniatures ! Right now, gonna have to squeeze the workstation on a PC desk already in use or maybe in a wardrobe !
ReplyDelete@Keven R.: Why not? Neither I do own a house, I still live with my parents. I just made room to buil a desktop/hobby desk =P
ReplyDeleteCheck my Warseer thread, there are lots of designs of workstation, even in wardrobes!! ;D
Already saw it, Miniature Scenery are awesome, but I don't have 200-300 buck for that. The other workstation got lot of good idea. Right now, my wardrobe is full of things, so I can't put a desk in it. I got a PC desk in L shape, so I'm planning to use the _ shape of it to put a workstation on it for a start. Right now, that's what I about to build : http://imageshack.us/f/199/workstation2.jpg/
ReplyDeleteMasonite board, wood board and stud/wood glue to have a no screw design (easier to take it in pieces for transport ans reassembling and to add modules after, like my water/cleaning cup modules on the image)
Each bottle are placed in a hole drilled with a hinge bit, keeping them safe in about a 1" hole. (I use P3 color, total of 60 + 6 ink. Gonna go with 4 row of 15 (picture show 13) and a row of 6 at the back (ink are higher in size) and some hole for medium and etc.) Gonna put a sticker before each color for easier search.
ReplyDeleteYour design looks cool! Kinda difficult to build (drilling all those holes, at least, for me xD) but promising. If you can, go ahead! I could only encourage you to build a pair, or make room to 100 paints, at least.
ReplyDeleteWhen I was building my racks, I owned like 90+ paints. I made room to hold 120. Now I own like 140+. Asume it, the paints are just as adictive as plasticrack xD
For any further questions, don't hesitate dropping me an email ;D
I don't know how you can go to that much paint ! I'm planning to use only the P3 selection for now, but I'm sure my design can be modified to add more.
ReplyDeleteIt's seem difficult at first, but not that much. With the wood stud, I'll be easier to add components/modules to it.
I'm doing to kind of stuff because I got time, but because it will be good practice for building something more complex in the near future. I'm planning a home in 3-4 years maximum, so gonna go with a 50% room only for painting, terrains, prop, etc.
Btw, my design is primary based on yours ! When making it via Google SketchUp (free and excellent software), I added the little cavity where I will be able to place my miniatures when the glue is in action or painted. I could add little door, but too much stuff right now.
ReplyDeleteI think that if I get rid of that cavity, I could easely add like 20-40 more paint hole to go around 80-100. I'm gonna look at it.
Hey thank you for the comment on my blog. I remember seeing this article when it was published, but I failed to find it again when I was looking for it a couple of weeks ago. Great setup you got there!
ReplyDelete-Corvus
I know this is an old post, but hey, I've only just found your blog.
ReplyDeleteI think the word you were looking for was "decant". Meaning, to "gradually pour (wine, port, or another liquid) from one container into another, typically in order to separate out sediment." Basically it means "transfer".
I too transferred/decanted my paint collection into other pots, but I opted for dropper bottles. I used a different method though, used a homemade centrifuge. It was quick (which meant that the paint didn't get a chance to dry out) and every last skerrick of paint was collected.
I like the labels you made for them.....looks snazzy!
Thanks the one! Just noticed your post. I miss the "las posts" addon of Blogger!
ReplyDeleteThank you so much for the information which is the better application to download from all the devices which will heloful for all the downloaded files
ReplyDeletehttp://apkfasak.bravesites.com/
I've used many other brushes and the Nylox Glide with the angle sash cut is the most versatile. If you are a homeowner looking for a good paint brush that will last the rest of your life, get that pink bristled Nylox Glide and keep it clean. Paint Brush Manufacturer
ReplyDelete