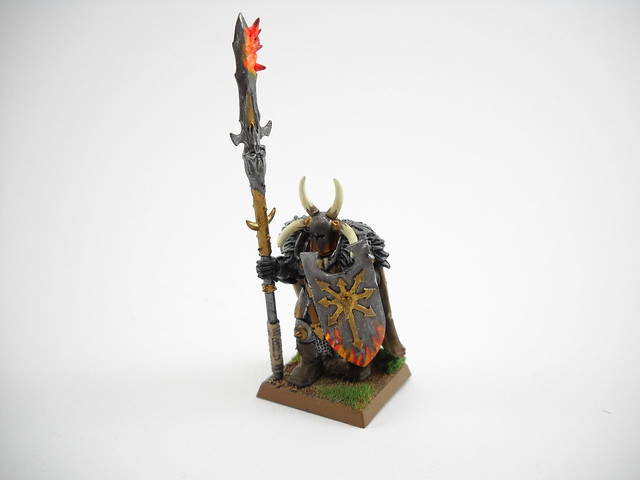
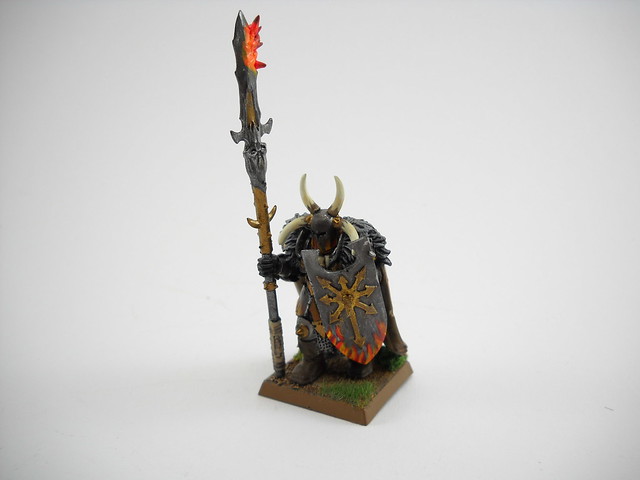
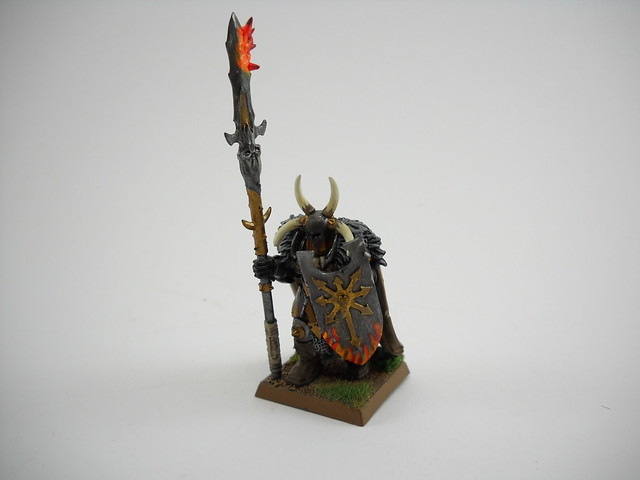
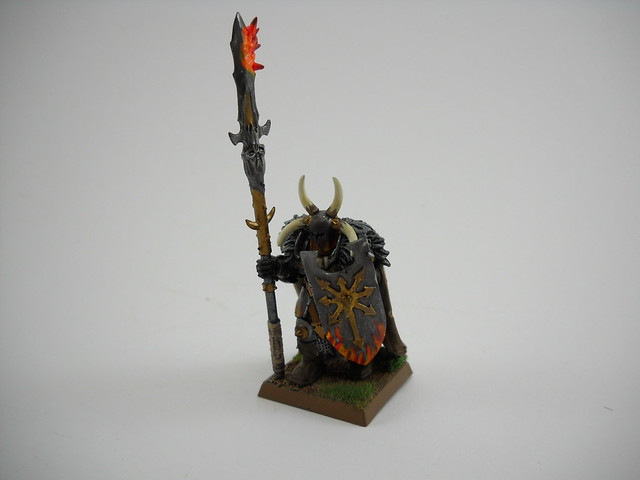
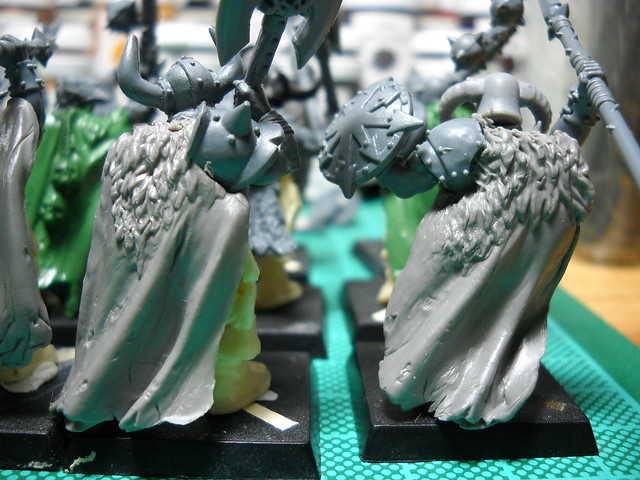
Hi again ladies and gentlemen (is there any lady btw? xD)
Today, a quick hobby tip. How to clean your files (without screwing them up!).
I found this method in a blog wichs name I didn't save. Sorry!
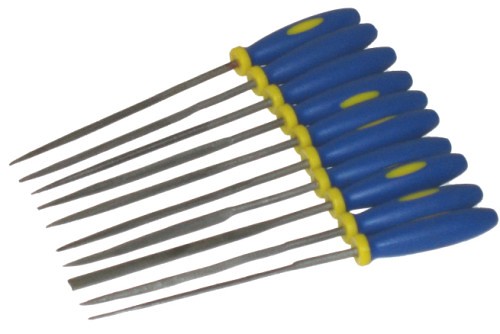
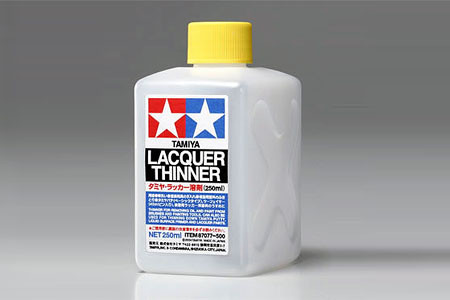
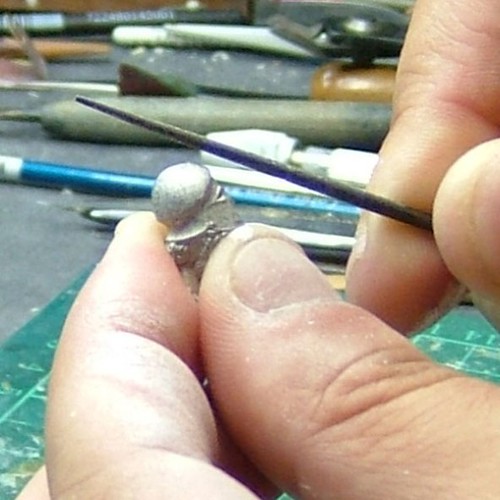
Everyone knows that needle files don’t work very well when they are dirty and caked with debris. If you didn't know, you should! To clean your files, use a small clean jar of choice. All you need to do is fill the jar with lacquer thiner and put your needle files in there!
For the ones who don't know, the lacquer thiner is a mixture of solvents, used to dilute, dissolve and clean up of lacquer products. Typically too caustic for oil paints, lacquer thinner is often used additionally for removing inks on metal, and adhesive residue from a variety of surfaces. Lacquer thinner is very strong and rapidly deteriorates many surfaces and fabrics
Just put your clogged needle filesinto the thinner and close the lid to avoid the fumes. Just be cautious not to submerge the rubber handles of the files. Wait for an hour, remove the file and clean it off with an old thooth brush. Then, your files will be as good as new!
The lacquer thinner can be found on most of your favourite art supplies stores, and also in any hardware store.Whoever sells paints could sell lacquer thinner, among other solvents and thinners!
Well, that's for now, I hope this little tip can help you a bit ;)
Now, back to Real Life -.-
See ya soon!
PS: I've said NEEDLE FILES! Not diamond files. Be aware, some chemicals can screw your diamond file, eating the glue that attachs the diamond particles to the file!
Saturday, April 16, 2011
Sunday, April 3, 2011
SHOWCASE: FW Open Day 2011 pics!
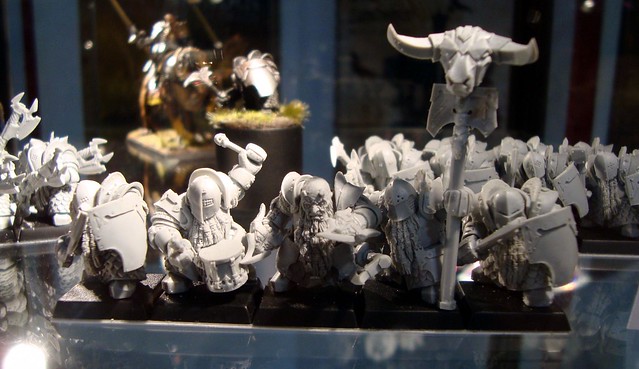
Well, these previews are definitely worth seeing.
Check out the incoming Chaos Dwarf Inmortal Guard, Great Taurus, chaotic stuff and even some more miniatures for the Empire!
Fullscreen, then play. Enjoy!
See ya!
Check out the incoming Chaos Dwarf Inmortal Guard, Great Taurus, chaotic stuff and even some more miniatures for the Empire!
Fullscreen, then play. Enjoy!
See ya!
Saturday, April 2, 2011
TUTORIAL: Getting the Citadel colours
Hello! Long time without posting.
Last week I failed my goal of "at least one post per week". Yeah, Real Life messing it up again.
Well, now I'm gluing the sand to my Chaos Marauders and still waiting for some paints to arrive from the UK so I'll start primming the dwarves I'm going to paint for Tomas.
So, nothing new to show today. Another bunch of WIP and black coated models doesn't seem as a good idea, specially considering the amount of awesome entries in the blogosphere about Adepticon.
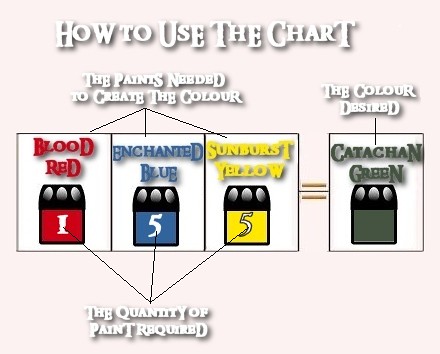
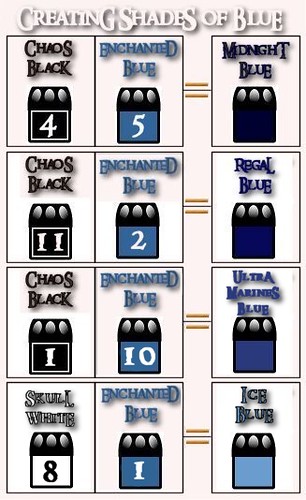
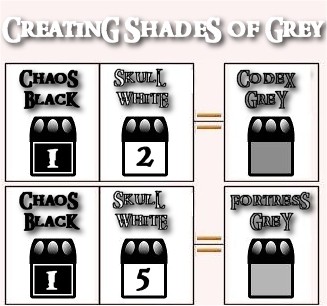
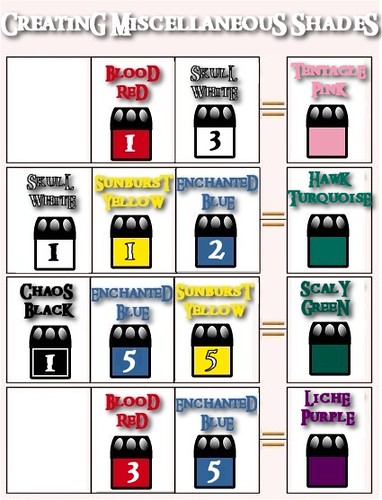
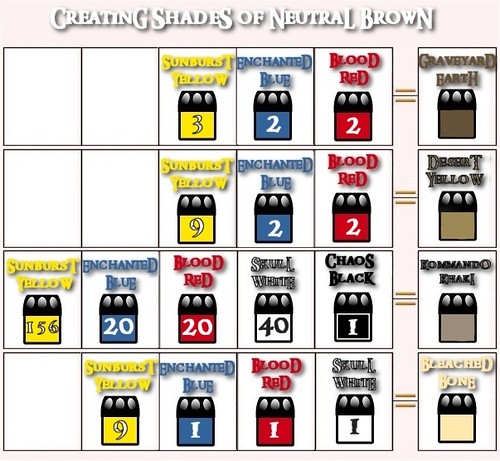
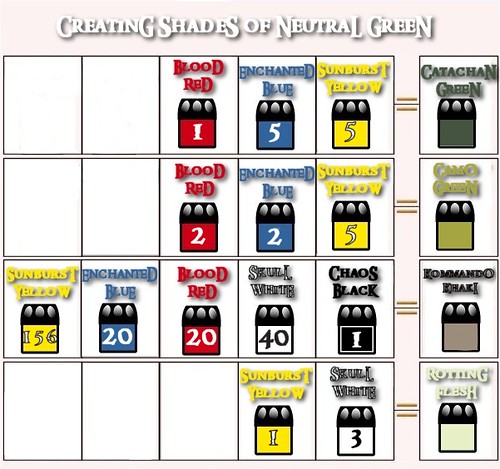
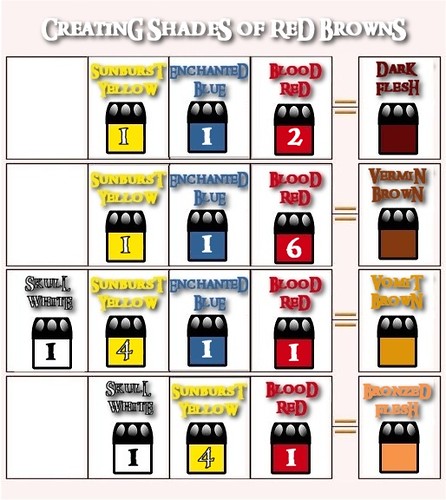
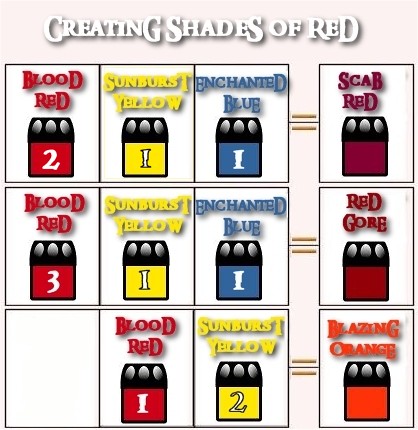
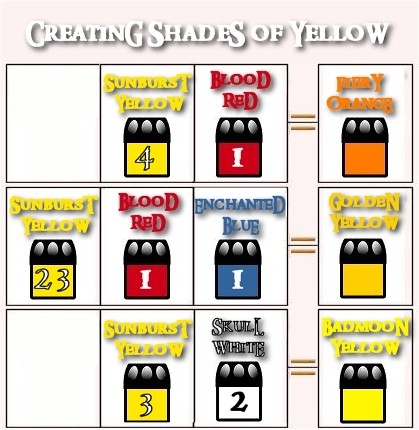
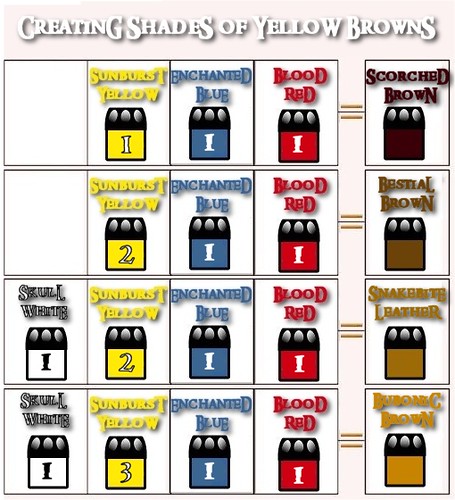
What can I offer you? A pretty old technique to achieve the entire Citadel Colour range, using only 5 colours.
This charts were posted in an old LOTR webpage. I don't even recall the name, but when the page went offline, I tried to save those pics, but couldn't. I used google cache to copy the e-mail from the web-admin and explained I wanted to save this wonderful receipes. He kindly sent them to me and granted permission to post them wherever I would like to. So, after having posted this tutorial 2 years ago in my local forum, I would like to share it with all of you!
All you need to do is having 5 brushes, hopefully, identical and a palette. If you have dropper bottles, even easier and much more precise. If wanted to do with only 1 brush, get "an" amount of the desired paint, clean your brush and get "another" with the same brush, as many times as you need. This is pretty useful when starting painting or when you don't have all the range of paints you would like to. I used this charts when I didn't own any purples, only 2 differents greens and no pink. And it worked wonderfully!
Well, that's for now. Hopefully next week I'll be able to show you something more interesting xD
Anyways, I encourage you to try these charts and achieve all those colours discontinued from the Citadel Colour Range. Specially if you don't have a stock of Golden Yellow, Scaly Green, Tentacle Pink, Terracota, etc! All those preciousssss, removed by the GW suits >.<
See ya next time!
PS: before being called mad by someone ofuscated with the receipe of Kommando Khaki, let me tell you can round up a bit the quantity of paint. This even work to achieve some shadow and highlight colour of the same colour! ;D
Tuesday, March 15, 2011
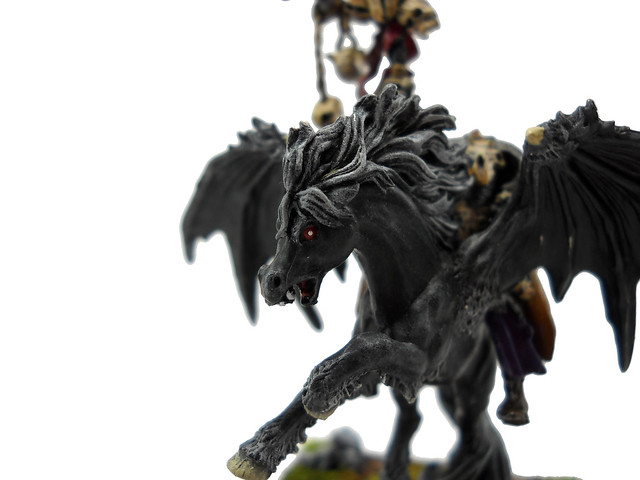
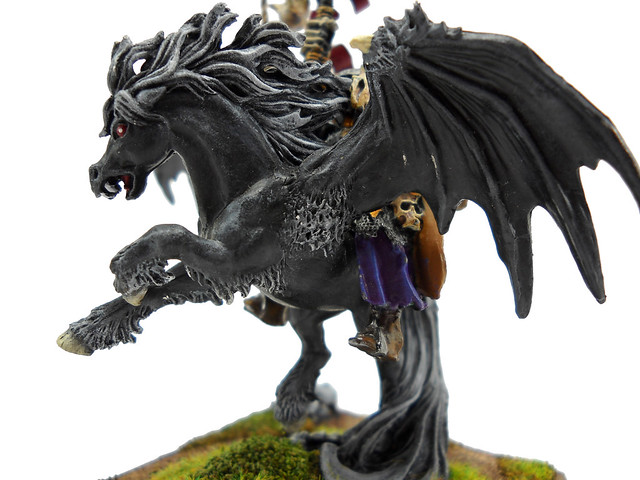
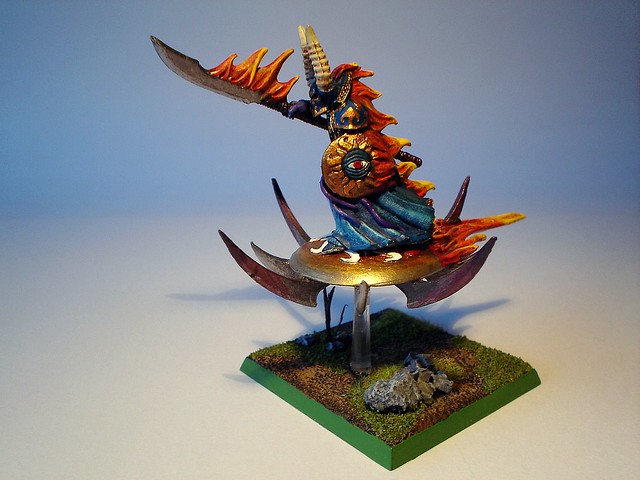
SHOWCASE: Chaos Sorcerer Lord on Demonic Mount
Showcase time again!
Stealing some time from periodontology study-hours to post this! hohohoho
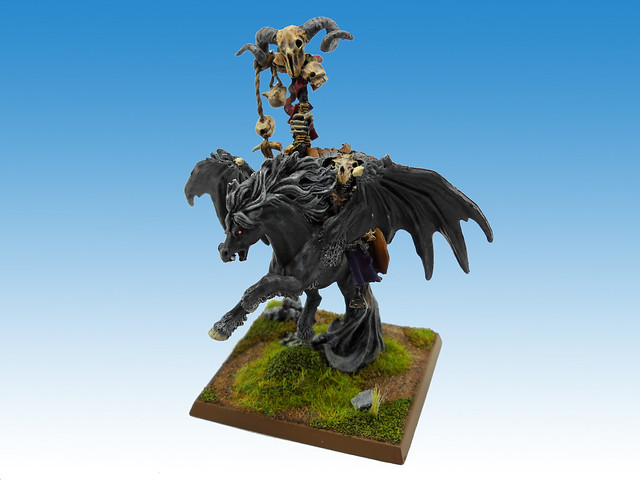
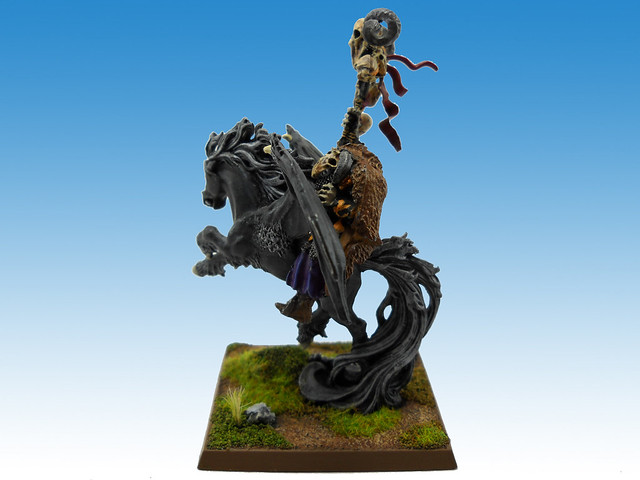
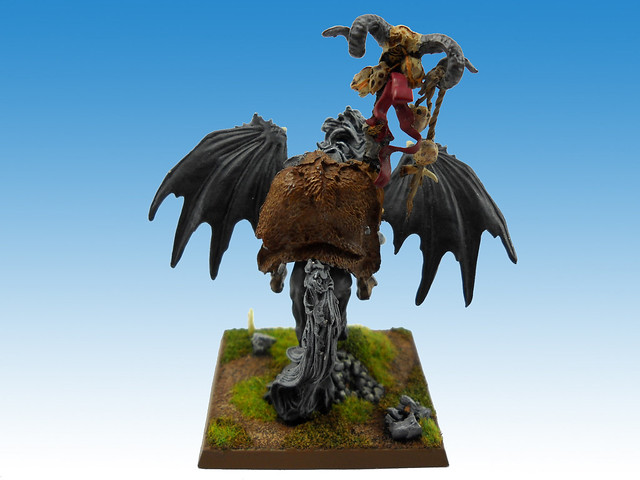
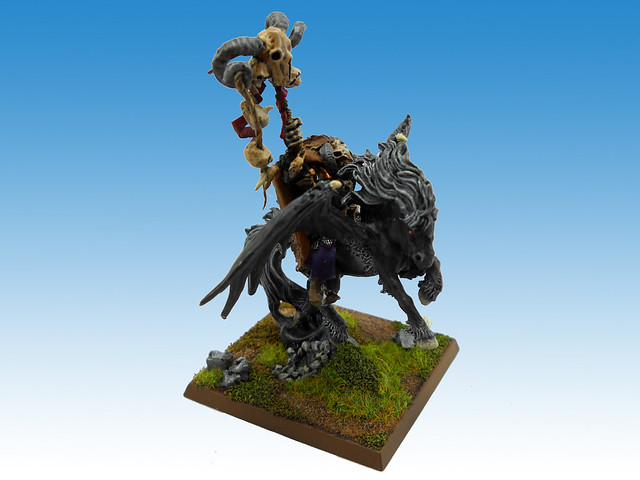
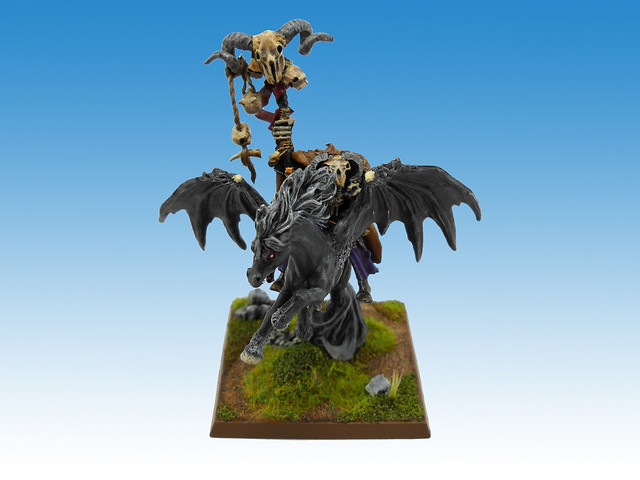
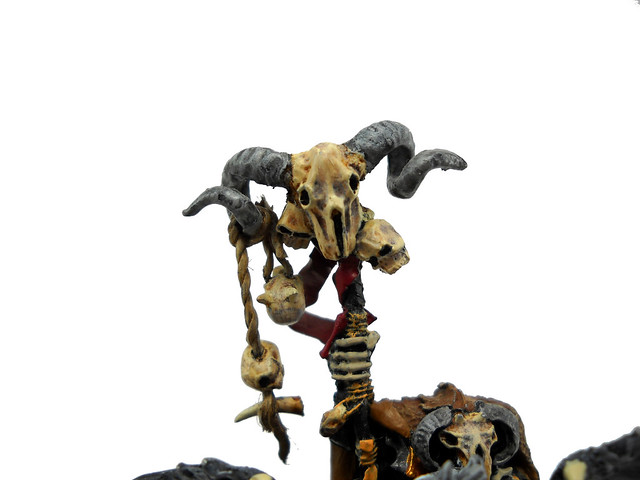
Well, continuing with the insane amount of sorcerers I own, this time I'll show another oldie. I think this was the second mounted sorcerer I built. I converted it using a Storm Steed, from Reaper Miniatures and that old chaos sorcerer that GW still sells nowadays. Just changed the horns of that big skull and added some more ropes and skulls, and some rags to the staff.
I converted the mount just slightly. I repositioned the wings to let the sorcerer to seat (xD), added some fur on the armpits of the mount and played with some GS to make the whole miniature stand higher.
Well, that's for now. I hope you liked this old miniature. Unfortunately, no more time to write about it, Real Life don't forgive neither forgets if I don't study xD
Next time I'll start showing some mounted lords, to change subject; maybe it were just too much sorcerers for now!
Or maybe I'll show some WIP of the dwarves heroes I'll be working in the next weeks. New commision works, yaaay! =D
See you next time! As always, comments, critics and questions are welcomed ;D
Tuesday, March 8, 2011
SHOWCASE: Chaos Mounted Sorcerer Lord
Hello again!
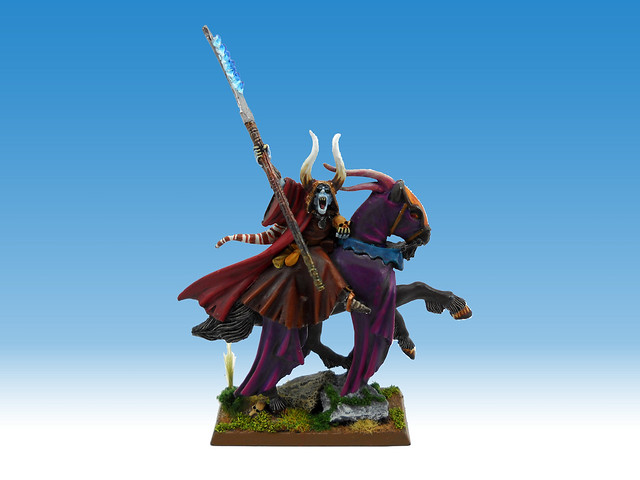
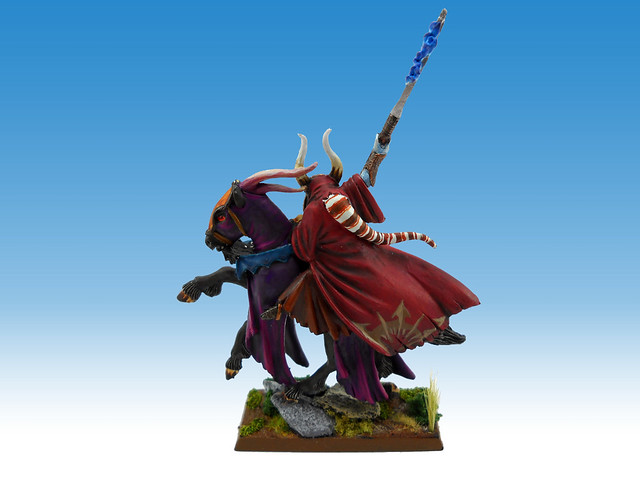
No more tutorials now xD (at least, in the near future =P ). Today I'll show you one of the last minis I painted, the limited edition of a chaos sorceror mounted on chaos steed. I had some kind of bad memories about this miniature, because I bought it in ebay, while it was really a limited edition model, and costed quite a lot. And... before I received it, GW decided to sell it just as a normal direct-only model -.-
Well, enough blah blah, now, my Chaos Sorcerer Lord on Chaos Steed!
And this is the pic I sent to a local painting contest.
(EDIT: that I recently won xD This miniature can be seen the whole month in the home page of our local wargammes forum!)
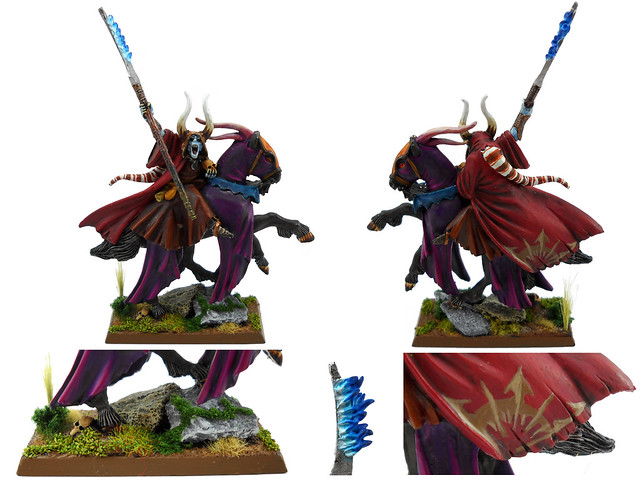
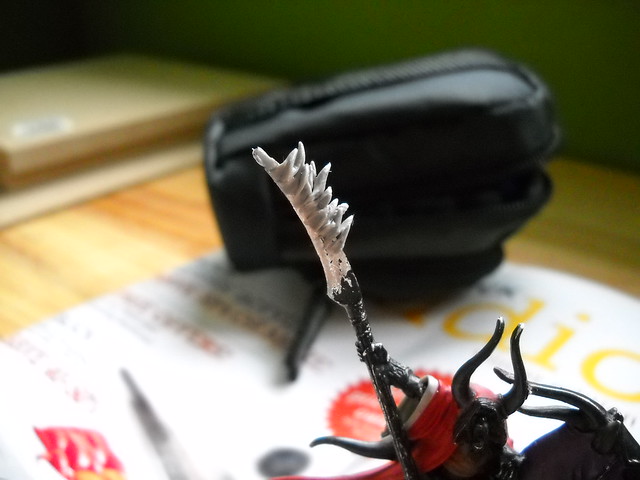
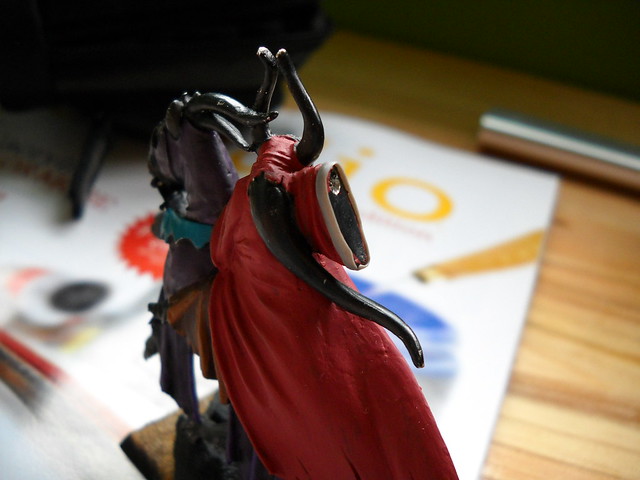
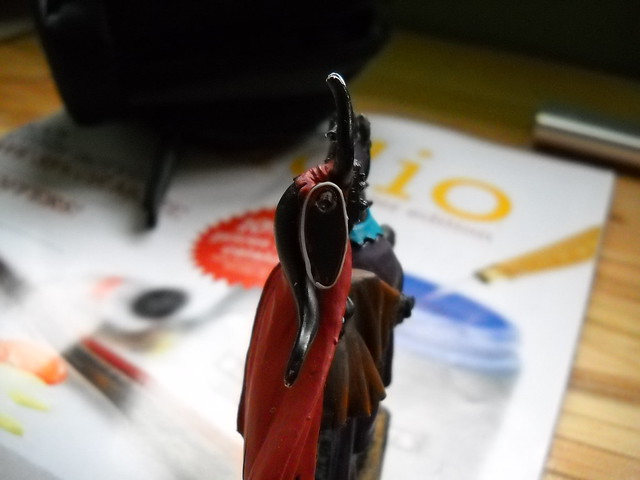
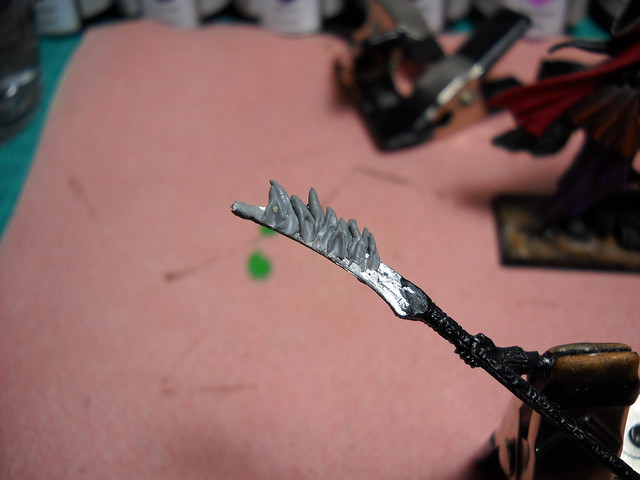
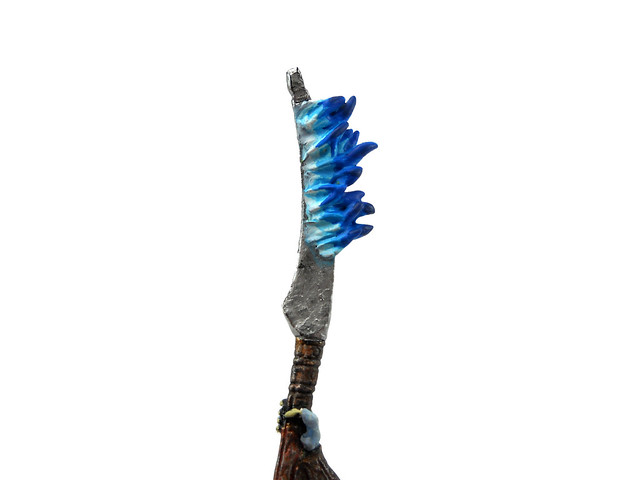
And here some details shots of the unfinished minis, showing the sculpted flames and fixed sleeve. I sculpted that last one because it looked strange for me, like a tube, without border xD
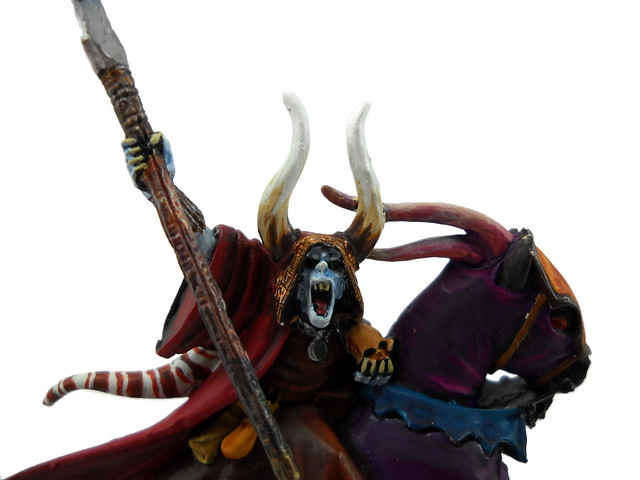
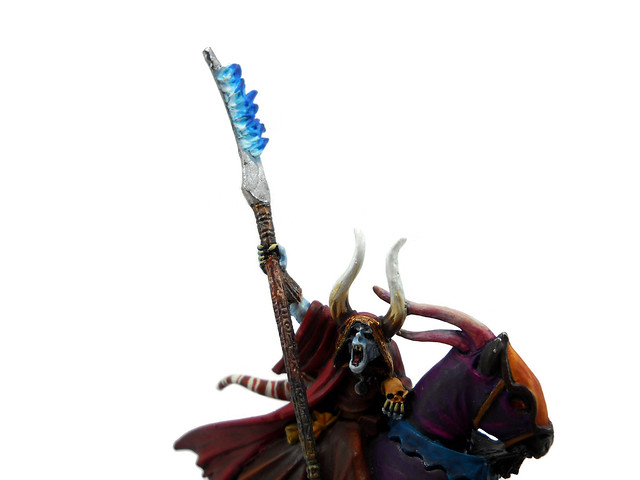
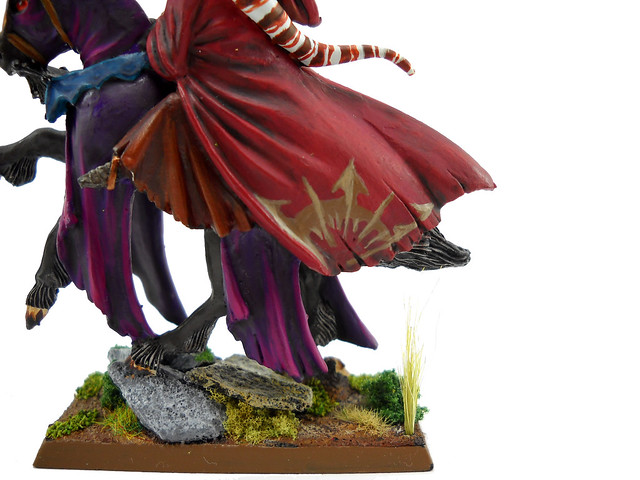
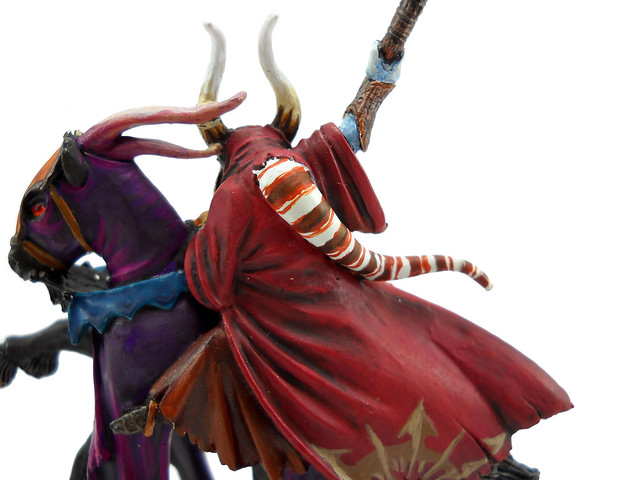
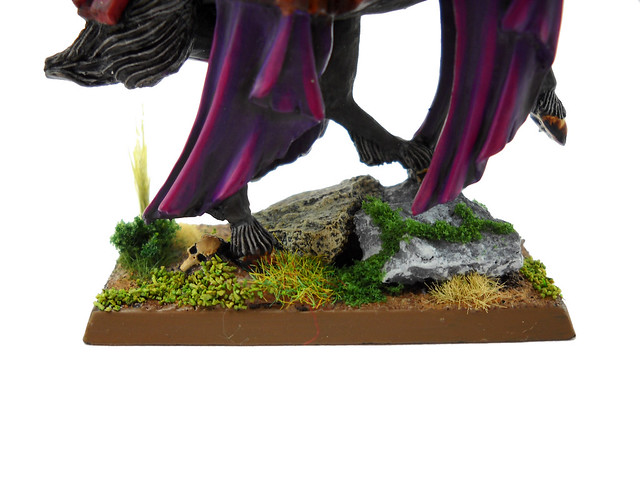
And some closeups to the finished miniature.
I painted the blue fire, after the suggestion of my friend Topo, who remembered me that the oxygen produces some blue/white fire when oxygen gets burned. Green fire was also an alternative, don't remember wich element burned green, but the idea smelled too much to skaven in my mind, so blue was the choice.
This was my first attempt at freehand painting. Not as difficult as I thought it would be. it's not an awesome freehand, but it's ok.
The tentacle scheme was another suggestion of my friend, Thomas said "green! nor, pink! No, better you take a look at real and poisonus octopus!!" So, I searched and found this fella. Replicating octopus colour schemes, what a nice idea Tomas, thank you very much!!
And the base! How much I love to base models! hahaha
Well, hope you liked this mini.
I'll be posting another painted miniatures in the near future, so stay tunned!
See ya soon!
Friday, March 4, 2011
TUTORIAL: Miniature Photography, part 3
Let's go with the final part of this tutorial! (at least for now, maybe someday I'll post something else about this xD)
Now it's time to talk about photo edition. Let's learn some basics about photoshop, to be able to slightly retouch something like the previous pic of my Chaos Lord with additional hand weapon...
...and finish having something like this:
Well, I tried doing a video of my desktop to explain this, but it was too heavy (60Mb) and it doesn't look good enough pasted in the blog. So, I made a slideshow instead!
As usual, bring the popcorn, take a seat, click the fullscreen button and enjoy.
OK, this is the end of this long tutorial!
I hope you find it helpful and specially I hope you can improve your photography skills a little. Maybe it's a little boring, and too much information, but look, this were my pics:
And nowadays, they look like this:
Tell me. Isn't it worth such little effort? =D
Well, see ya soon, hope you like the final part of my tutorial!
As always, comments and critics are welcomed! If you have any question, please tell me! I'll be glad trying to help you! ;D
Wednesday, March 2, 2011
TUTORIAL: Miniature Photography, part 2
Hi again. Let's begin with the second part of this tutorial, this time it will be discused how to take the pics, and common mistakes made by hobby entusiasts.
The idea, is to stop making this thing of pics...
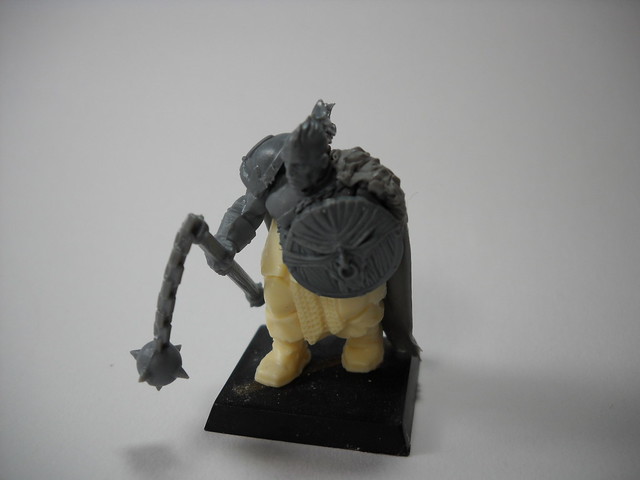
...and begin making this sort of pictures, to be able to edit them and get some awesome images to display.
First, let's understand what's white balance (WB). Hopefully, you'll be lucky enough to have a (~50USD) digital camera with adjustable WB. If you don't, don't worry, you can compensate that with exposure compensation (xD).
So, what's WB? In few words, is the process of removing unrealistic color casts, so that objects which appear white in person are rendered white in your photo. Proper camera white balance has to take into account the "color temperature" of a light source, which refers to the relative warmth or coolness of white light. Our eyes are very good at judging what is white under different light sources, but digital cameras often have great difficulty with auto white balance (AWB) and can create unsightly blue, orange, or even green color casts. Understanding digital white balance can help you avoid these color casts, thereby improving your photos under a wider range of lighting conditions.
Blue, purple and grey casts:
Correct and incorrect WB:
Color temperature describes the spectrum of light which is radiated from a "blackbody" with that surface temperature. A blackbody is an object which absorbs all incident light neither reflecting it nor allowing it to pass through. A rough analogue of blackbody radiation in our day to day experience might be in heating a metal or stone: these are said to become "red hot" when they attain one temperature, and then "white hot" for even higher temperatures. Similarly, blackbodies at different temperatures also have varying color temperatures of "white light." Despite its name, light which may appear white does not necessarily contain an even distribution of colors across the visible spectrum.
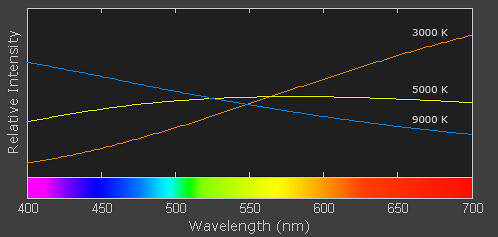
Note how 5000 K produces roughly neutral light, whereas 3000 K and 9000 K produce light spectrums which shift to contain more orange and blue wavelengths, respectively. As the color temperature rises, the color distribution becomes cooler. This may not seem intuitive, but results from the fact that shorter wavelengths contain light of higher energy.
Why is color temperature a useful description of light for photographers, if they never deal with true blackbodies? Fortunately, light sources such as daylight and tungsten bulbs closely mimic the distribution of light created by blackbodies, although others such as fluorescent and most commercial lighting depart from blackbodies significantly. Since photographers never use the term color temperature to refer to a true blackbody light source, the term is implied to be a "correlated color temperature" with a similarly colored blackbody. The following table is a rule-of-thumb guide to the correlated color temperature of some common light sources.
Since some light sources do not resemble blackbody radiators, white balance uses a second variable in addition to color temperature: the green-magenta shift. Adjusting the green-magenta shift is often unnecessary under ordinary daylight, however fluorescent and other artificial lighting may require significant green-magenta adjustments to the WB. Fortunately, most digital cameras contain a variety of preset white balances, so you do not have to deal with color temperature and green-magenta shift during the critical shot. These are commonly used symbols for each.
The first three white balances allow for a range of color temperatures. Auto white balance is available in all digital cameras and uses a best guess algorithm within a limited range usually between 3000/4000 K and 7000 K. Custom white balance allows you to take a picture of a known gray reference under the same lighting, and then set that as the white balance for future photos. With "Kelvin" you can set the color temperature over a broad range. If you can, set it manually. Try some shots with different temperatures, select one and then go ahead.
The remaining six white balances are listed in order of increasing color temperature, however many compact cameras do not include a shade white balance. Some cameras also include a "Fluorescent H" setting, which is designed to work in newer daylight-calibrated fluorescents.
The description and symbol for the above white balances are just rough estimates for the actual lighting they work best under. In fact, cloudy could be used in place of daylight depending on the time of day, elevation, or degree of haziness. In general, if your image appears too cool on your LCD screen preview (regardless of the setting), you can quickly increase the color temperature by selecting a symbol further down on the list above. If the image is still too cool (or warm if going the other direction), you can resort to manually entering a temperature in the Kelvin setting. If you are lucky, maybe your camera hasn't these options, but gives you the choice of saving the pics in RAW files. If your camera supports them, you can set up the WB after the pics are taken.
Well, what to do if you only have AWB? (My previous camera was that way!) Then let's play with exposure compensation (EC)! Exposure Compensation is a feature of a camera that allows you to adjust the exposure measured by its light meter. Usually, the range of adjustment goes from +2 to -2 EV in 1/3 steps. This means that you can adjust the exposure measured by the light meter by telling the camera to allow more light in (positive exposure compensation) or to allow less light in (negative exposure compensation). Technically, you could take note of the exposure measured by the light meter, and then switch to Manual mode and adjust it manually yourself.
The best advices I can give (with my limited knowledge) are 1) set the exposure compensation manually before taking the real pics, view them at your PC and then choose the best setting; or 2) turn ON Automatic Exposure Bracketing (AEB). Many digital cameras now include Automatic Exposure Bracketing (AEB) where the camera will take the three shots with one press of the shutter release button: one at the camera measured exposure, a second at a negative exposure compensation (usually -1/3 EV, though some cameras allow you to specify the amount), and a third at a positive exposure compensation (usually +1/3 EV, though some cameras allow you to specify the amount). The normal 100USD cameras don't bring this option, so, let's go a bit deeper about the first advice.
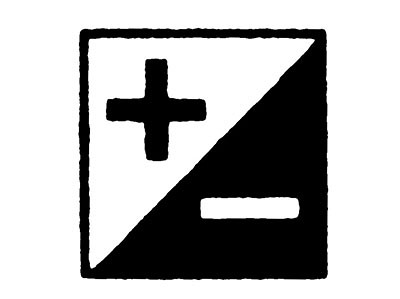
When having your lightbox ready with your miniature, turn ON the programm exposure mode (designated by letter P). The Exposure Compensation button or menu choice is usually marked by a square containing a plus and a minus symbol. Some cameras, though, just display "0.0" on the LCD screen. Check your camera manual for the specifics.
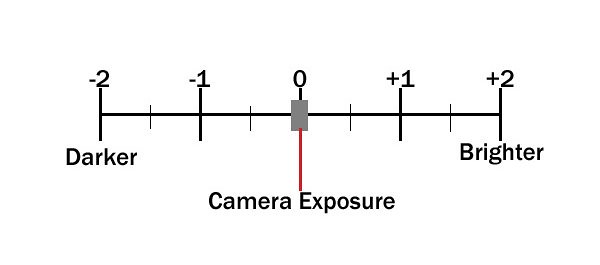
Turning on the Exposure Compensation button or menu choice displays a sort of "ruler" with zero in the middle and numbers on either side. A marker appears under the zero, which stands for the normal exposure your camera gives the picture. Using the arrow keys or a dial on the back of the camera, you can move this marker to a different position on the ruler.
Moving the marker to the "plus" side of zero makes your picture brighter. Placing the marker under +1 makes the image twice as bright as a normal exposure.Moving the marker to the "minus" side of zero makes your picture darker. Placing the marker under -1 makes the image twice as dark as a normal exposure.
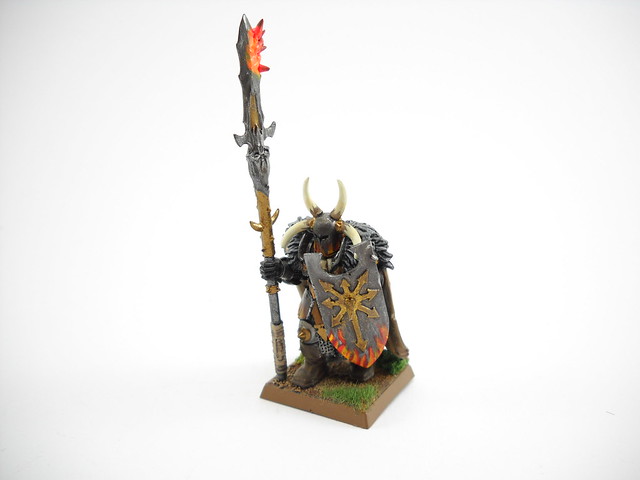
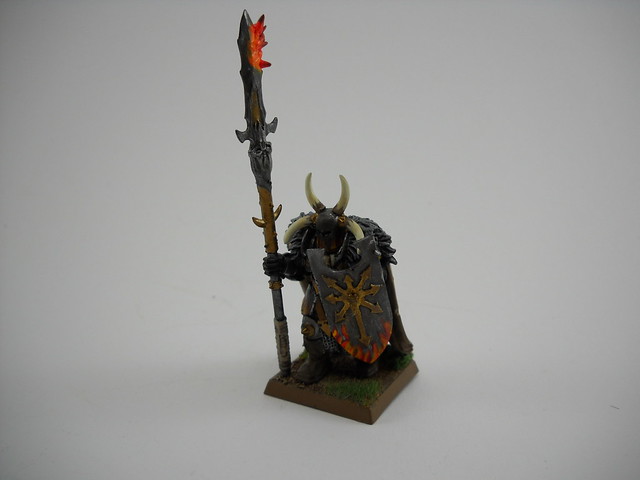
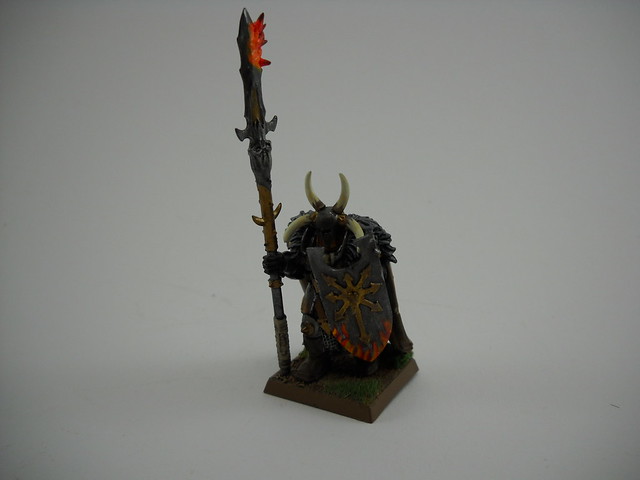
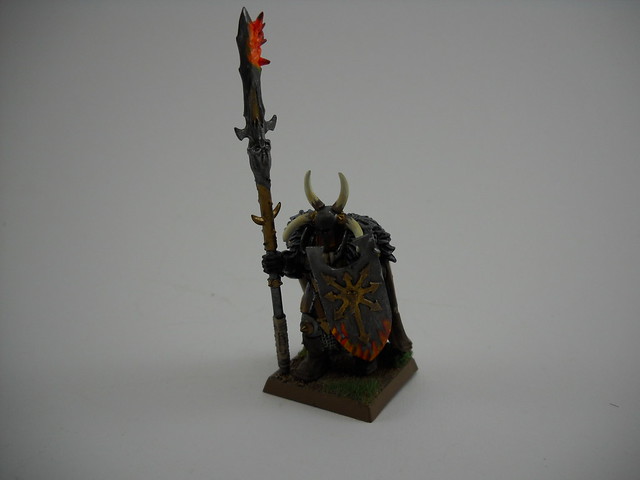
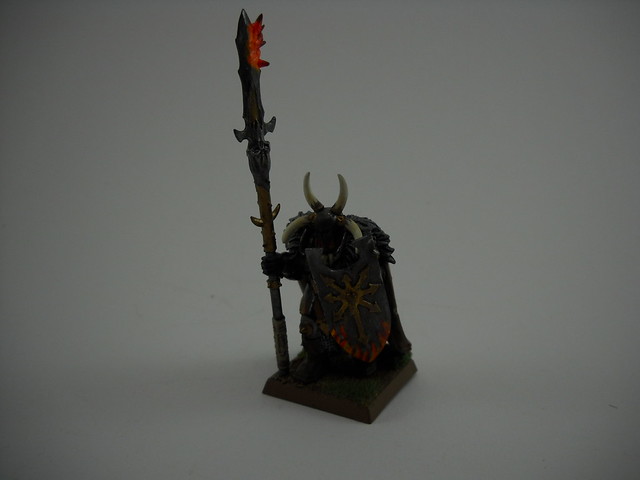
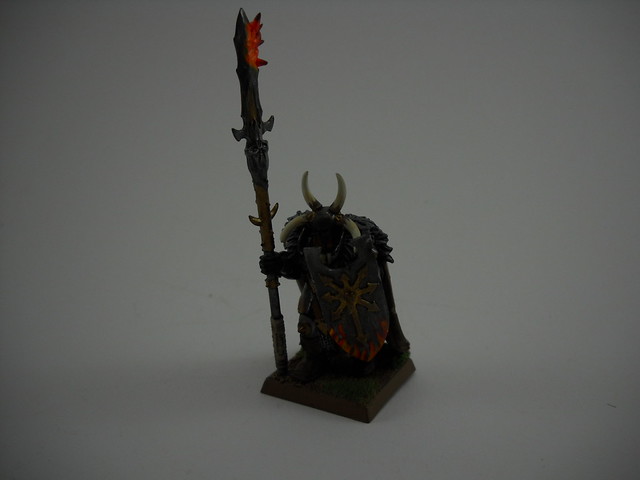
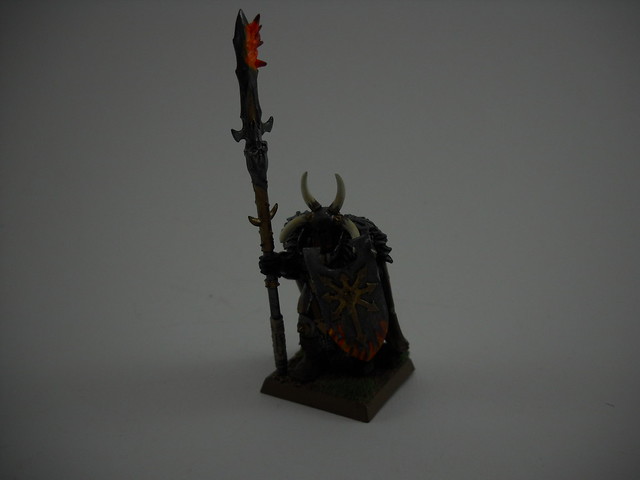
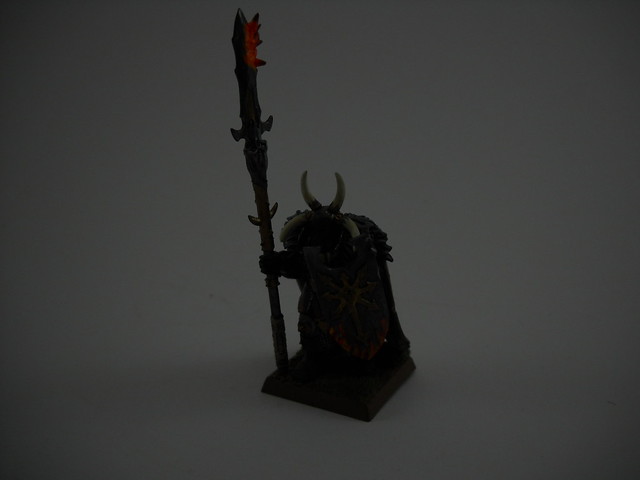
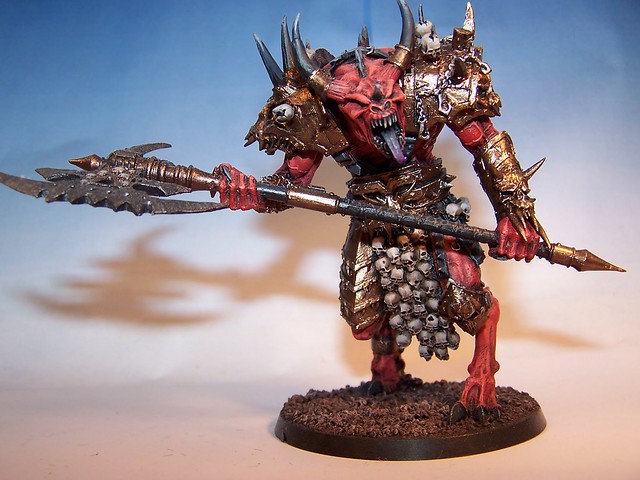
Below you can see how changing the exposure compensation control affects the brightness of my Chaos Warrior with Halberd:
(those are DIFFERENT PICS, using different EC in each)
+2 EV
+1,7 EV
+1,3 EV
+1 EV
+0,7 EV
+0,3 EV
0
-0,3 EV
-0,7 EV
-1 EV
-1,3 EV
-1,7 EV
-2 EV
With my lightbox and my setup ready, I decided that the best option for me this time is to set up the EC to +1EV. Now I'll take all the pics I need from that model, with the chosen setup (lamps, bulbs, position of the miniature, of the light sources) using EC +1.
Doing this "tedious" process (that only consumes 1 minute, and will help you to make nice pics), you'll avoid the underexposure and overexposure that are SO common in the miniature photgraphy.
Now, to finish this large wall of text and chaotic information, let me give you the last advices I have in mind to improve your photography skills.
Avoid having lines from bended paper, fabric or background. It will ruin your pic almost instantly, because the camera will have "more and different whites" to process. If you see, the upper part of the background shows a kind of white (pretty brownish, but doesn't matter for this example) and the lower part, looks different. Why, if both parts are from a single piece of paper? That's because of the light inciding in different angles and being reflected in different angles too. Try to use curved paper, block or fabric as background.
Avoid cellphone pictures if you are going to publish them. Really, they are not intended for this purpose. And let the tidy backgrounded images JUST for WIP shots. (I even regret having post some cellphone-pics, regarding being WIP shots)
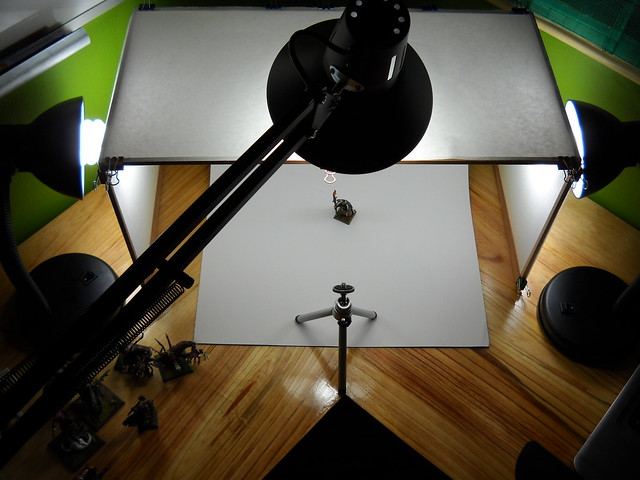
Set up you light sources carefully. I've already suggested my favourites bulbs, but, how to set up them? Easy! The lateral ones should be on the same axis of the miniature. The upper light should be over the miniature (OH RLY? xD) but just between the camera and the object.
Never, ever, use flash to photography your minis. This will cause more shadows (that you should be avoiding!). The light produced by the flash it's just too much for miniature photography. Just give exposure compensation a try and you'll not want to try flashing your minis again. This will be specially useful for photography black, white and greyish miniatures.
And finally, activate the macro mode! I think most of you know what the macro mode is (that's why I forgot to mention this in the first instance xD), but anyways...
Macro and close-up photography can take the viewer to new and seldom seen vantage points. However, macro photography also often demands more careful attention to photographic technique and camera shake. When you magnify a subject, you also magnify movements caused by camera shake. Furthermore, small variations in camera position can also make huge differences in subject composition. It's therefore critical to either experiment with what you're capable of capturing hand-held, or to just always use a camera tripod. I strongly recommend having a small and cheap tripod (mine costed 3USD) and for even better results, try using your camera self-timer mode, or even a remote switch. These pics are fast made examples of the macro mode off and on.
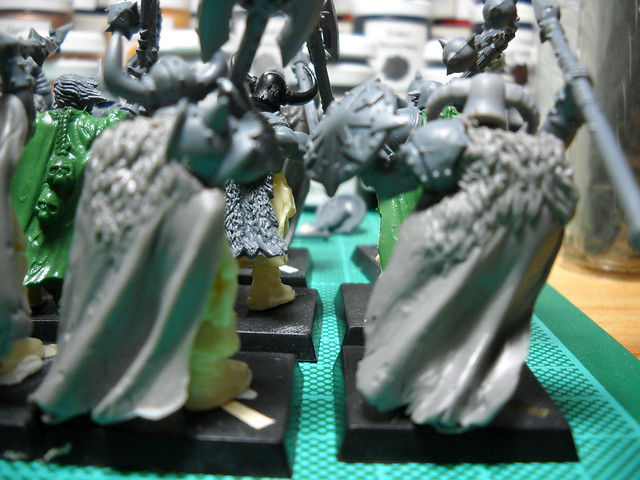
Photos at high magnification have a correspondingly shallow depth of field. Precisely controlling the location of focus is therefore much more important than normal. This requires both artistic decisions about what should be in sharpest focus, but also technical decisions about how to make the most of this sharpness. The first pic illustrates the focus, badly located (focusing the 2nd rank of Chaos Marauders).
In the second, the location of the focus is set to the cloaks and shoulders of the Marauders.
Well, I'm already sorry for having bored you so much. Didn't want to make this part SO long, but I thought some basic concepts should be included. I really hope you can improve your miniature photography a little. If you can improve them just a little bit using some of this information, I would feel already paid and honoured.
As always, comments, critics and questions are welcomed!
See ya soon, with the final part of this tutorial! (I promise it won't be this long xD I hope I can learn to make a little video to explain how to finish and add background to the pics using PS, faster than this epic long entry!)
PS: Please. To the owners of the above shown pics, PLEASE don't feel offended. I just selected some random pics to show some common mistakes. I tried to use every single pic I had, but weren't enough. If you want your pic to be removed, just drop me an e-mail and I'll do it instantly. ;D
EDIT: Added small paragraph about macro. Thanks to N810 for ponting me that I've completely forgot to mention it xD
The idea, is to stop making this thing of pics...
...and begin making this sort of pictures, to be able to edit them and get some awesome images to display.
First, let's understand what's white balance (WB). Hopefully, you'll be lucky enough to have a (~50USD) digital camera with adjustable WB. If you don't, don't worry, you can compensate that with exposure compensation (xD).
So, what's WB? In few words, is the process of removing unrealistic color casts, so that objects which appear white in person are rendered white in your photo. Proper camera white balance has to take into account the "color temperature" of a light source, which refers to the relative warmth or coolness of white light. Our eyes are very good at judging what is white under different light sources, but digital cameras often have great difficulty with auto white balance (AWB) and can create unsightly blue, orange, or even green color casts. Understanding digital white balance can help you avoid these color casts, thereby improving your photos under a wider range of lighting conditions.
Blue, purple and grey casts:
Correct and incorrect WB:
Color temperature describes the spectrum of light which is radiated from a "blackbody" with that surface temperature. A blackbody is an object which absorbs all incident light neither reflecting it nor allowing it to pass through. A rough analogue of blackbody radiation in our day to day experience might be in heating a metal or stone: these are said to become "red hot" when they attain one temperature, and then "white hot" for even higher temperatures. Similarly, blackbodies at different temperatures also have varying color temperatures of "white light." Despite its name, light which may appear white does not necessarily contain an even distribution of colors across the visible spectrum.
Note how 5000 K produces roughly neutral light, whereas 3000 K and 9000 K produce light spectrums which shift to contain more orange and blue wavelengths, respectively. As the color temperature rises, the color distribution becomes cooler. This may not seem intuitive, but results from the fact that shorter wavelengths contain light of higher energy.
Why is color temperature a useful description of light for photographers, if they never deal with true blackbodies? Fortunately, light sources such as daylight and tungsten bulbs closely mimic the distribution of light created by blackbodies, although others such as fluorescent and most commercial lighting depart from blackbodies significantly. Since photographers never use the term color temperature to refer to a true blackbody light source, the term is implied to be a "correlated color temperature" with a similarly colored blackbody. The following table is a rule-of-thumb guide to the correlated color temperature of some common light sources.
| Color Temperature | Light Source |
| 1000-2000 K | Candlelight |
| 2500-3500 K | Tungsten Bulb (household variety) |
| 3000-4000 K | Sunrise/Sunset (clear sky) |
| 4000-5000 K | Fluorescent Lamps |
| 5000-5500 K | Electronic Flash |
| 5000-6500 K | Daylight with Clear Sky (sun overhead) |
| 6500-8000 K | Moderately Overcast Sky |
| 9000-10000 K | Shade or Heavily Overcast Sky |
Since some light sources do not resemble blackbody radiators, white balance uses a second variable in addition to color temperature: the green-magenta shift. Adjusting the green-magenta shift is often unnecessary under ordinary daylight, however fluorescent and other artificial lighting may require significant green-magenta adjustments to the WB. Fortunately, most digital cameras contain a variety of preset white balances, so you do not have to deal with color temperature and green-magenta shift during the critical shot. These are commonly used symbols for each.
The first three white balances allow for a range of color temperatures. Auto white balance is available in all digital cameras and uses a best guess algorithm within a limited range usually between 3000/4000 K and 7000 K. Custom white balance allows you to take a picture of a known gray reference under the same lighting, and then set that as the white balance for future photos. With "Kelvin" you can set the color temperature over a broad range. If you can, set it manually. Try some shots with different temperatures, select one and then go ahead.
The remaining six white balances are listed in order of increasing color temperature, however many compact cameras do not include a shade white balance. Some cameras also include a "Fluorescent H" setting, which is designed to work in newer daylight-calibrated fluorescents.
The description and symbol for the above white balances are just rough estimates for the actual lighting they work best under. In fact, cloudy could be used in place of daylight depending on the time of day, elevation, or degree of haziness. In general, if your image appears too cool on your LCD screen preview (regardless of the setting), you can quickly increase the color temperature by selecting a symbol further down on the list above. If the image is still too cool (or warm if going the other direction), you can resort to manually entering a temperature in the Kelvin setting. If you are lucky, maybe your camera hasn't these options, but gives you the choice of saving the pics in RAW files. If your camera supports them, you can set up the WB after the pics are taken.
Well, what to do if you only have AWB? (My previous camera was that way!) Then let's play with exposure compensation (EC)! Exposure Compensation is a feature of a camera that allows you to adjust the exposure measured by its light meter. Usually, the range of adjustment goes from +2 to -2 EV in 1/3 steps. This means that you can adjust the exposure measured by the light meter by telling the camera to allow more light in (positive exposure compensation) or to allow less light in (negative exposure compensation). Technically, you could take note of the exposure measured by the light meter, and then switch to Manual mode and adjust it manually yourself.
The best advices I can give (with my limited knowledge) are 1) set the exposure compensation manually before taking the real pics, view them at your PC and then choose the best setting; or 2) turn ON Automatic Exposure Bracketing (AEB). Many digital cameras now include Automatic Exposure Bracketing (AEB) where the camera will take the three shots with one press of the shutter release button: one at the camera measured exposure, a second at a negative exposure compensation (usually -1/3 EV, though some cameras allow you to specify the amount), and a third at a positive exposure compensation (usually +1/3 EV, though some cameras allow you to specify the amount). The normal 100USD cameras don't bring this option, so, let's go a bit deeper about the first advice.
When having your lightbox ready with your miniature, turn ON the programm exposure mode (designated by letter P). The Exposure Compensation button or menu choice is usually marked by a square containing a plus and a minus symbol. Some cameras, though, just display "0.0" on the LCD screen. Check your camera manual for the specifics.
Turning on the Exposure Compensation button or menu choice displays a sort of "ruler" with zero in the middle and numbers on either side. A marker appears under the zero, which stands for the normal exposure your camera gives the picture. Using the arrow keys or a dial on the back of the camera, you can move this marker to a different position on the ruler.
Moving the marker to the "plus" side of zero makes your picture brighter. Placing the marker under +1 makes the image twice as bright as a normal exposure.Moving the marker to the "minus" side of zero makes your picture darker. Placing the marker under -1 makes the image twice as dark as a normal exposure.
Below you can see how changing the exposure compensation control affects the brightness of my Chaos Warrior with Halberd:
(those are DIFFERENT PICS, using different EC in each)
+2 EV
+1,7 EV
+1,3 EV
+1 EV
+0,7 EV
+0,3 EV
0
-0,3 EV
-0,7 EV
-1 EV
-1,3 EV
-1,7 EV
-2 EV
With my lightbox and my setup ready, I decided that the best option for me this time is to set up the EC to +1EV. Now I'll take all the pics I need from that model, with the chosen setup (lamps, bulbs, position of the miniature, of the light sources) using EC +1.
Doing this "tedious" process (that only consumes 1 minute, and will help you to make nice pics), you'll avoid the underexposure and overexposure that are SO common in the miniature photgraphy.
Now, to finish this large wall of text and chaotic information, let me give you the last advices I have in mind to improve your photography skills.
Avoid having lines from bended paper, fabric or background. It will ruin your pic almost instantly, because the camera will have "more and different whites" to process. If you see, the upper part of the background shows a kind of white (pretty brownish, but doesn't matter for this example) and the lower part, looks different. Why, if both parts are from a single piece of paper? That's because of the light inciding in different angles and being reflected in different angles too. Try to use curved paper, block or fabric as background.
Avoid cellphone pictures if you are going to publish them. Really, they are not intended for this purpose. And let the tidy backgrounded images JUST for WIP shots. (I even regret having post some cellphone-pics, regarding being WIP shots)
Set up you light sources carefully. I've already suggested my favourites bulbs, but, how to set up them? Easy! The lateral ones should be on the same axis of the miniature. The upper light should be over the miniature (OH RLY? xD) but just between the camera and the object.
Never, ever, use flash to photography your minis. This will cause more shadows (that you should be avoiding!). The light produced by the flash it's just too much for miniature photography. Just give exposure compensation a try and you'll not want to try flashing your minis again. This will be specially useful for photography black, white and greyish miniatures.
And finally, activate the macro mode! I think most of you know what the macro mode is (that's why I forgot to mention this in the first instance xD), but anyways...
Macro and close-up photography can take the viewer to new and seldom seen vantage points. However, macro photography also often demands more careful attention to photographic technique and camera shake. When you magnify a subject, you also magnify movements caused by camera shake. Furthermore, small variations in camera position can also make huge differences in subject composition. It's therefore critical to either experiment with what you're capable of capturing hand-held, or to just always use a camera tripod. I strongly recommend having a small and cheap tripod (mine costed 3USD) and for even better results, try using your camera self-timer mode, or even a remote switch. These pics are fast made examples of the macro mode off and on.
Photos at high magnification have a correspondingly shallow depth of field. Precisely controlling the location of focus is therefore much more important than normal. This requires both artistic decisions about what should be in sharpest focus, but also technical decisions about how to make the most of this sharpness. The first pic illustrates the focus, badly located (focusing the 2nd rank of Chaos Marauders).
In the second, the location of the focus is set to the cloaks and shoulders of the Marauders.
Well, I'm already sorry for having bored you so much. Didn't want to make this part SO long, but I thought some basic concepts should be included. I really hope you can improve your miniature photography a little. If you can improve them just a little bit using some of this information, I would feel already paid and honoured.
As always, comments, critics and questions are welcomed!
See ya soon, with the final part of this tutorial! (I promise it won't be this long xD I hope I can learn to make a little video to explain how to finish and add background to the pics using PS, faster than this epic long entry!)
PS: Please. To the owners of the above shown pics, PLEASE don't feel offended. I just selected some random pics to show some common mistakes. I tried to use every single pic I had, but weren't enough. If you want your pic to be removed, just drop me an e-mail and I'll do it instantly. ;D
EDIT: Added small paragraph about macro. Thanks to N810 for ponting me that I've completely forgot to mention it xD
Subscribe to:
Comments (Atom)

