
I was asked to tell how I make the pics of my minis, because nowadays, they look "fine". For me, they were just OK, they could be better with better lighting and a correct setup. That's why I decided to pay a promise I made to myself (xD) and build a lightbox and portable photography studio for less than 40 USD.
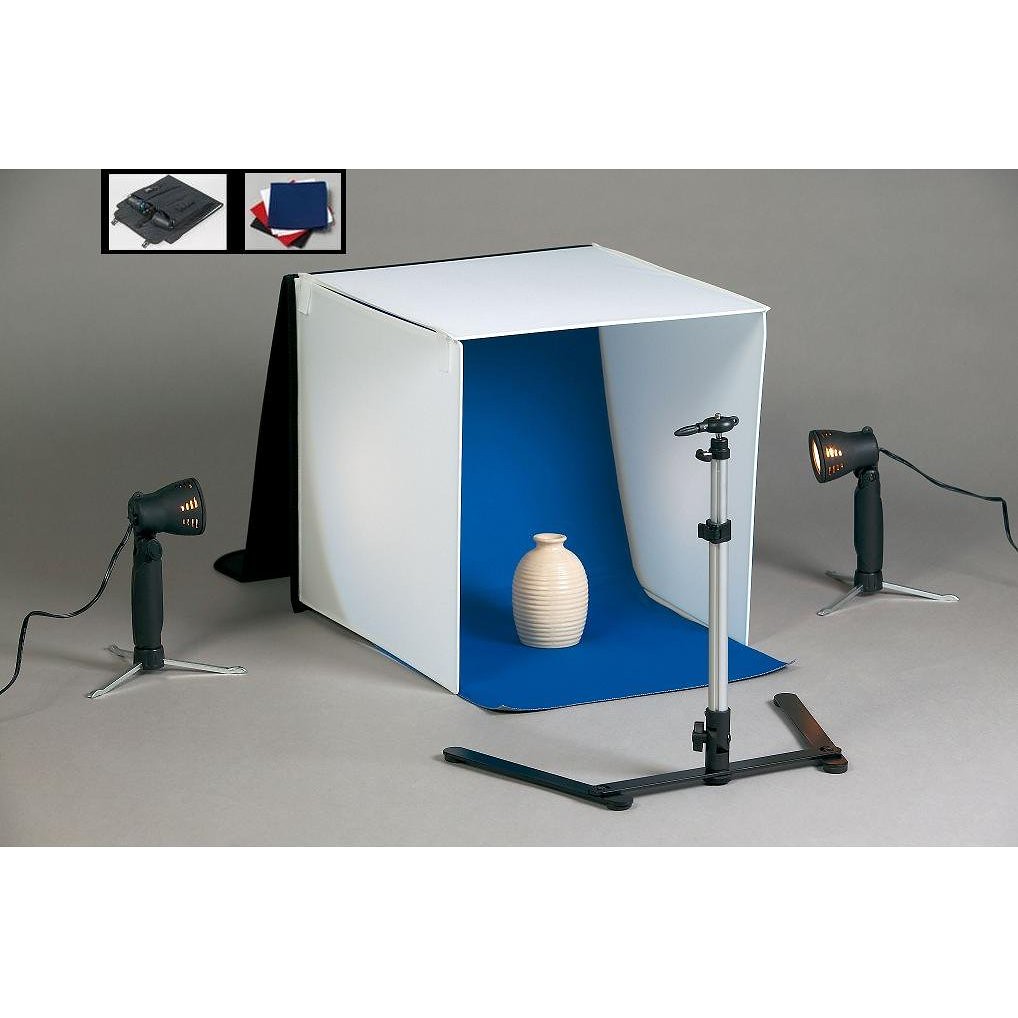
Short story: a friend of my dad went to the USA some weeks ago, and I was about to ask him to bring me a Portable Photo Studio, like the ones sold in Amazon.
In the last minute, I changed my mind and decided to ask for a colour shapers set, then I promised myself that I would make a better portable photo studio using less money. (Now I have the whole colour shapers set, and I'm a happy man! xD)
So, this was the perfect oportunity, to explain how I make the pics, to pay my promise and to make my pics better! Hoping that I haven't bored you too much, lets get building a portable lightbox and photo studio, for less than 40 bucks!
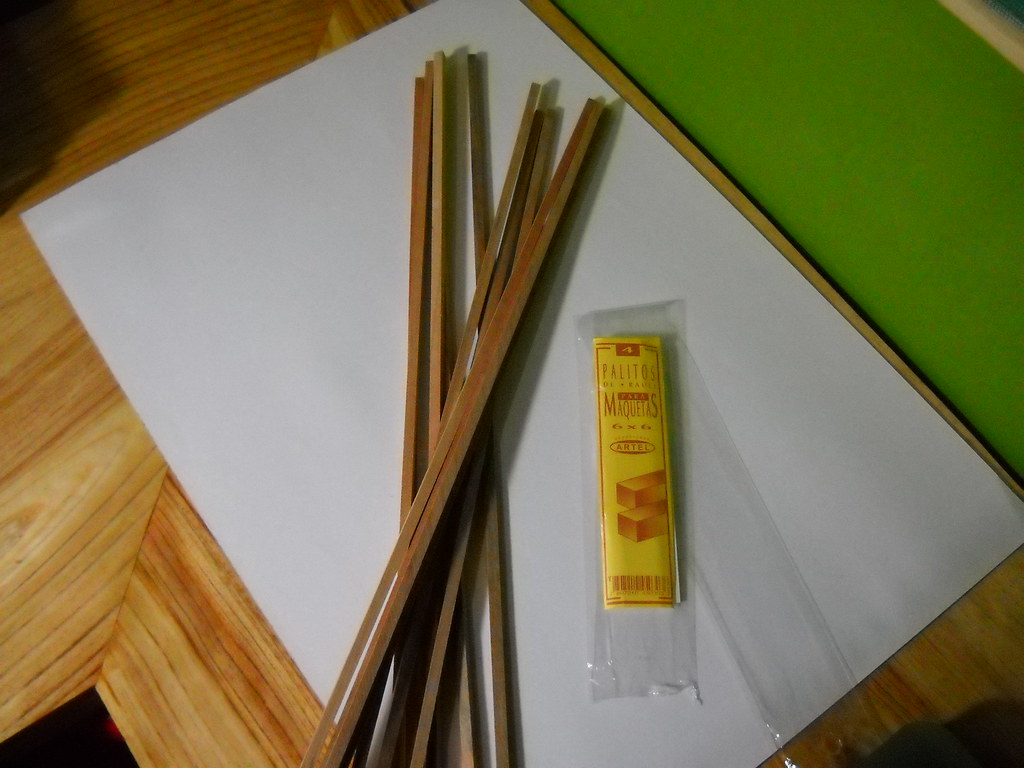
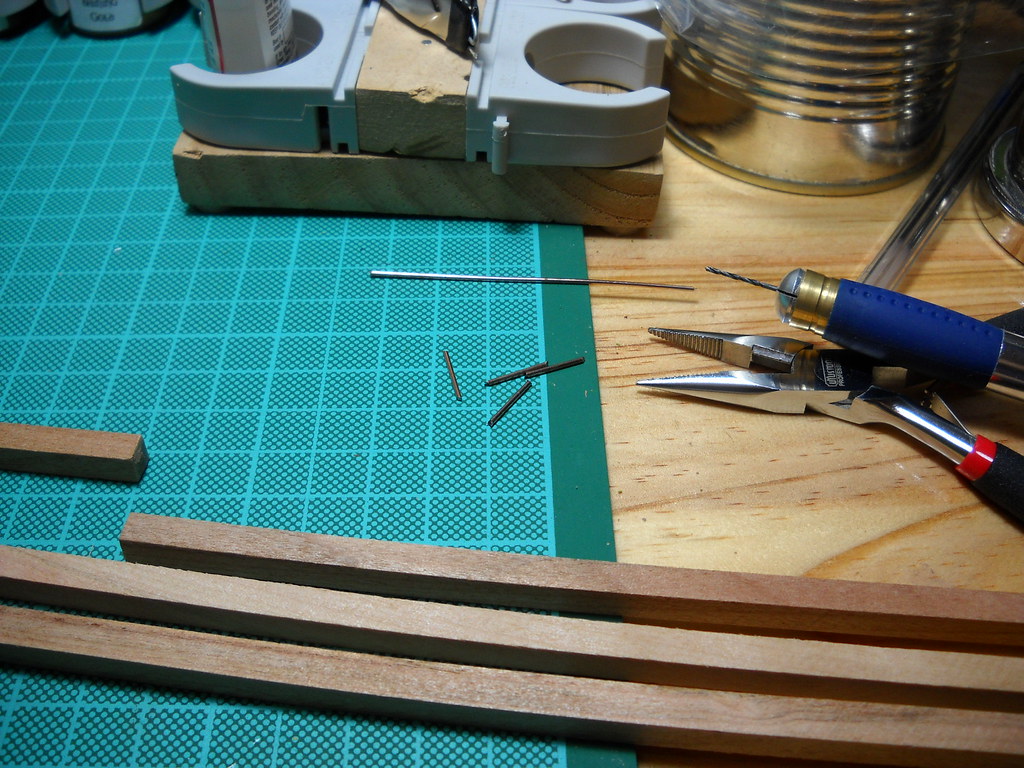
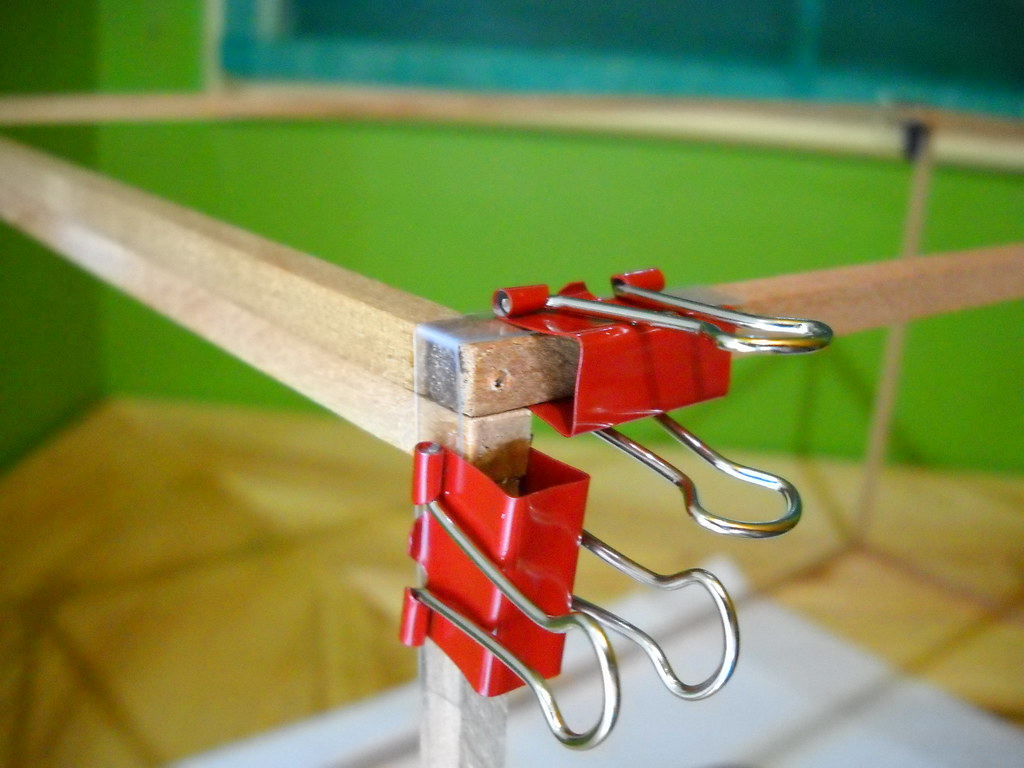
I began with the 6x6mm architecture wood sticks (2 USD for twelve 50cm pieces), cutting 4 in halves. I selected two more pieces, and another one, wich I cut 6mm. And then, using my hobby drill, drilled some holes and pinned them before gluing the wood sticks to form two 25x25cm square frames and one 25x50mm rectangular one.

Then I cut a blister package in four 90° bended pieces an used the bunch of paper clips (8 USD for 40 assorted colour pieces) to hold the frames in place, giving form to the lightbox.
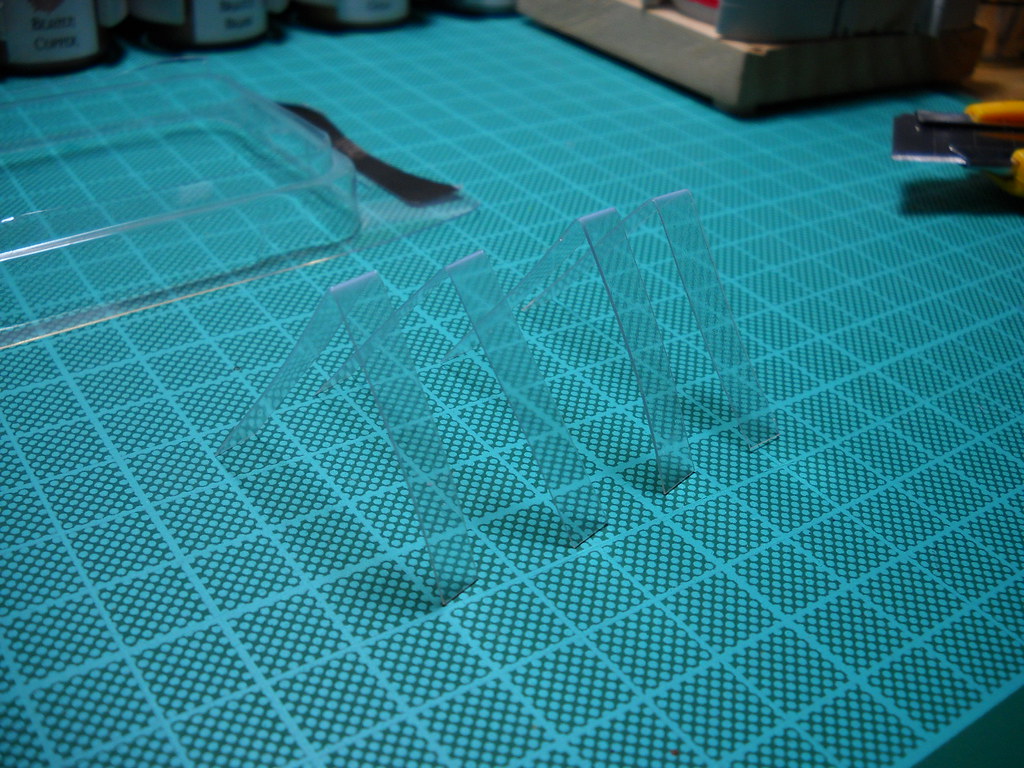

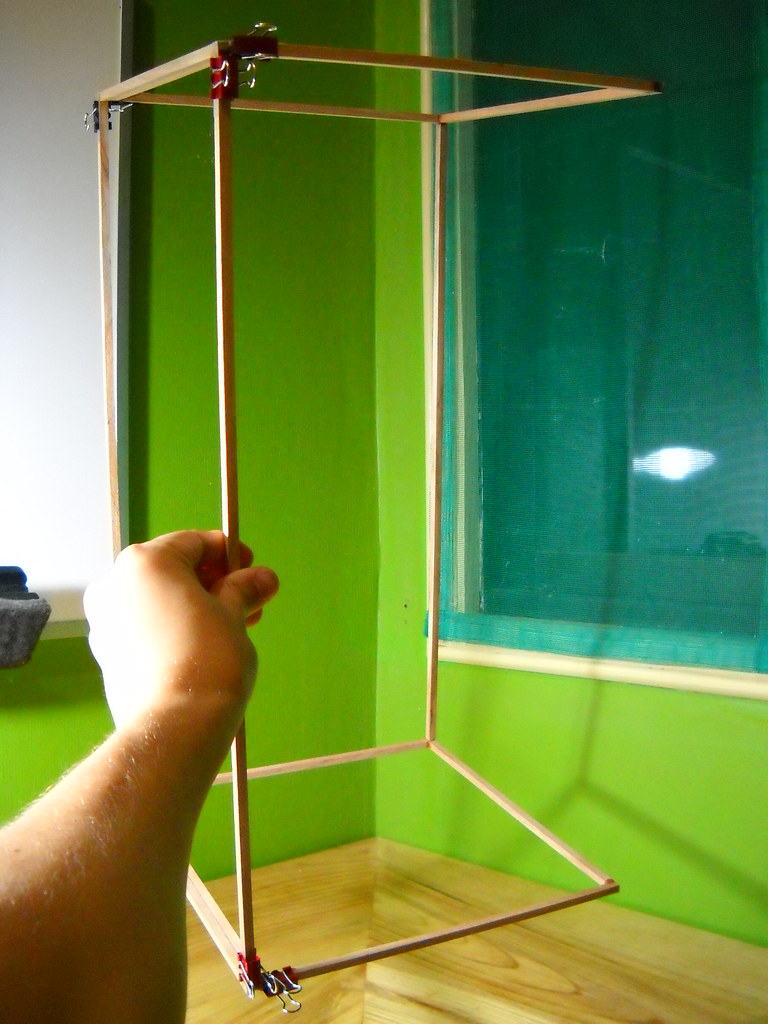
As you can see, the lightbox is quite fragile, but sturdy enough to mantain shape for itself. That's mainly because of the bended pieces of blister package and because of the pinned stick I cut 6mm before. One hole on the side of each squared frame and voilà.

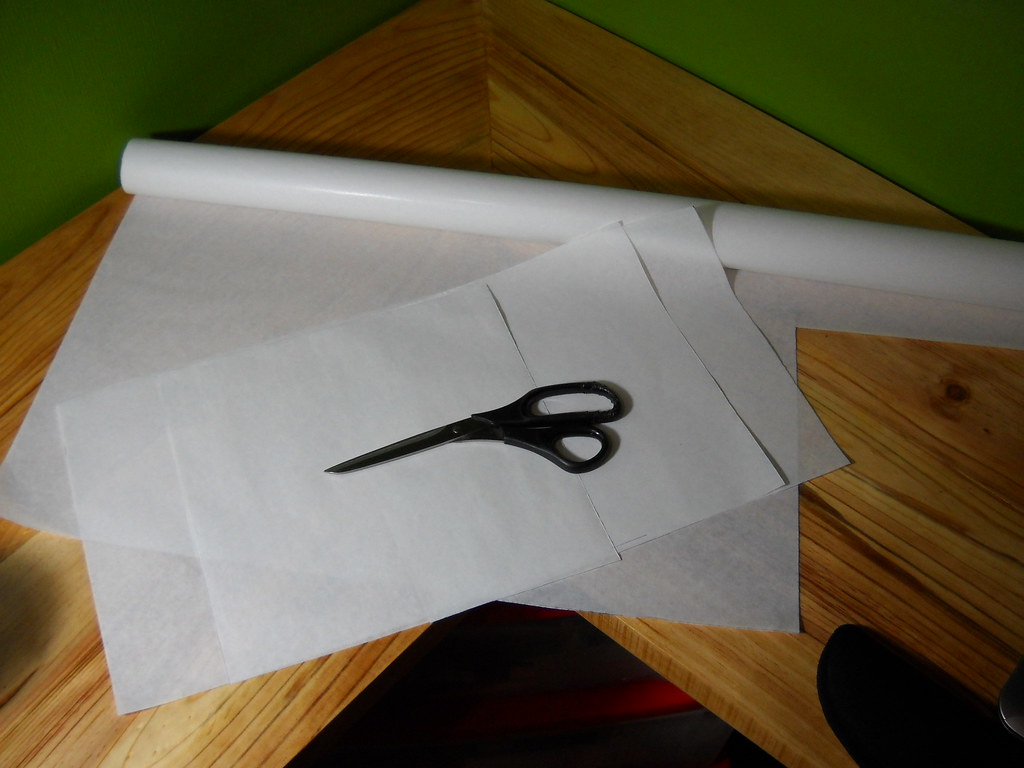
Then I cut two 25x25cm sheets of butter paper and one 25x50cm one and have plenty enough to build like 8 lightbox more (bought 1 square meter for less than 0,5 USD). With the help of the clips, I attached the butter paper to the frames.
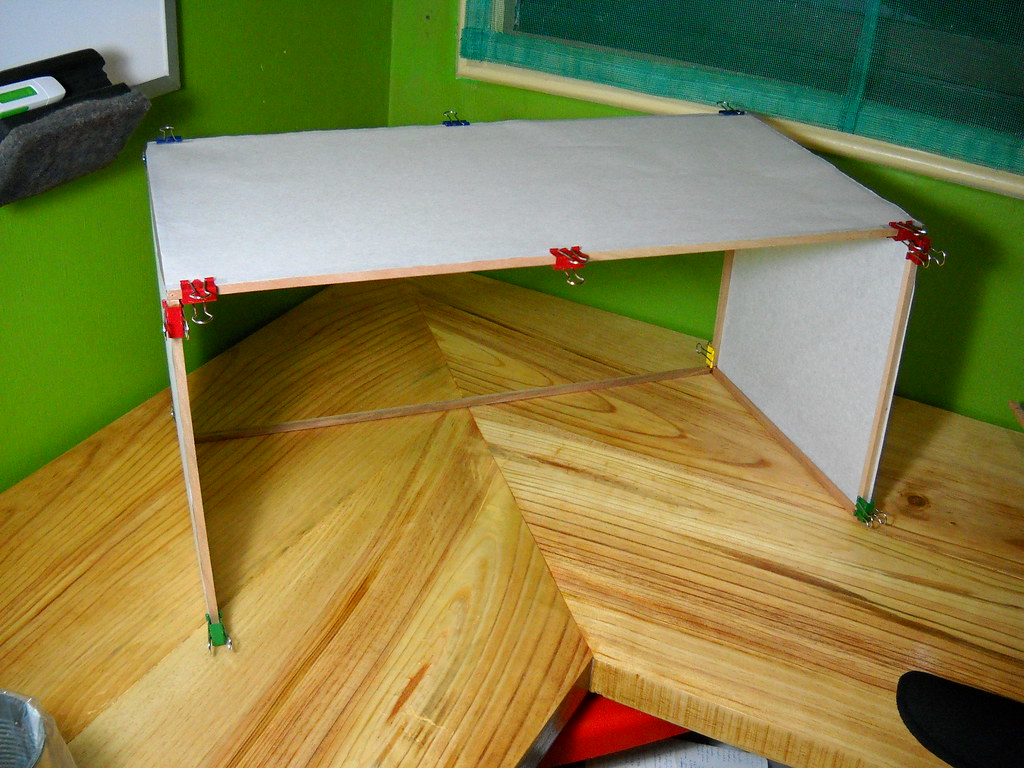

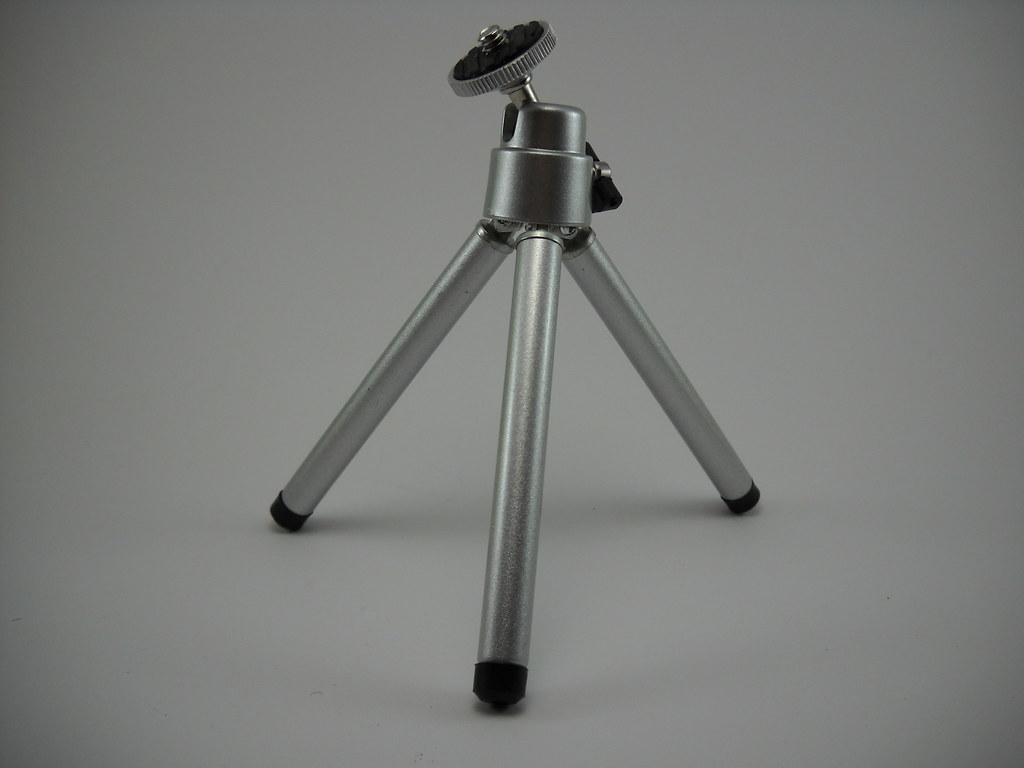
Before doing this, I tried diffusing light with several papers: diamond paper, butter paper, normal paper, craft paper, TNT fabric, and the best diffusing light is the butter paper (also, very cheap!). Then I got some big drawing block sheets and attached them with the help of more clips (kinda happy for having bought 40 xD). And I opened the package of my brandless mini-tripod (that i bought for 3 bucks!) to try it.

At this point, the studio looked like this:
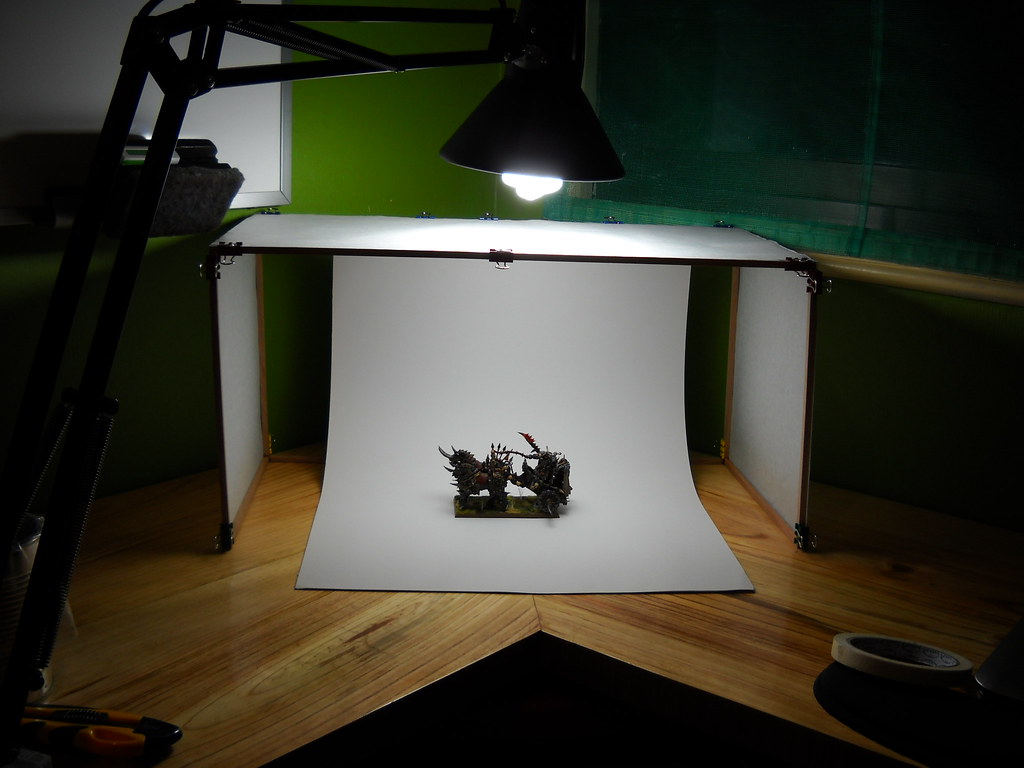
But then I added 2 lamps (4 bucks each) with 2 Twister Phillips energy saving 23W cooldaylight bulbs that light like 100W bulbs (wich costed 5.5 USD each). Yeah, bulbs were more expensive than the lamps. That's because lamps don't matter, but bulbs are critical for miniature photography. I suggest energy saving lamps, because they almost don't produce heat and consume less. The twister ones are my favourites and they should light like 100W or more. And the most important part: cooldaylight, or natural daylight. All the other stuff just spoils the pictures. Trust me, propper lighting is crucial.
Summing up, I bought:
- wood sticks 2USD
- paper clips 8USD
- butter paper 0,5USD
- mini tripod 3USD
- 2 lamps 4USD each
- 2 bulbs 5,5USD each
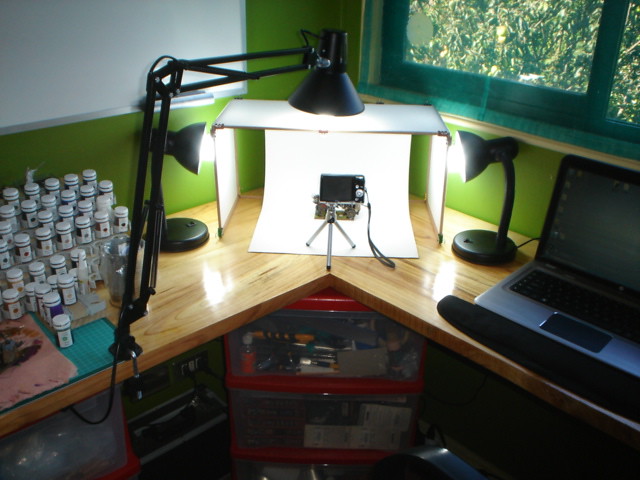
So, mission accomplished! Overall I spent ~32 USD to make my lightbox and photo studio. I forgot to make the final pic, but unassembled, it fits beneath my desk, over the drawers, in a 3cm high space between those 2 surfaces! Of course the 2 side lamps should be kept in their boxes when not needed ;D
Well, that's it for now. I hope you liked it so far, and hopefully, that this enourages you to make a better lightbox, if you haven't got one already!
In the second part of this tutorial, I'll explain a bit about lighting and how to make good pics. And in the third and last part... just guess!
See ya! Soon!

nice matey.. do you find the light is enough for the pictures throught the butter paper? I find my pictures are still dull, so i use the flash on the camera aswell as the 3 lamps. need to get out of this habbit though.
ReplyDeleteawesome post
ReplyDeleteMike
SCWH
@wicardobezmarillio: Sure! at least for my butter paper! hahaha Seriously, I think the butter paper it just the same over the world, isn't it? I think you may need more powerfl bulbs for your studio, or for the room lights. I use three 23W energy saving bulbs, that light like 100W each. Maybe you can try with 120W. And... do you use daylight bulbs? cooldaylight? That could be the problem. I've seen your latest pics (nice mins btw!) and the use of the flash drom the camera. The flash produces those creepy shadows in the pics, and they are specially bad, because of your background images! When using printed background, it's even more critical to avoid the shadows. I'll talk about in the part 2 of this tutorial! ;D
ReplyDelete@SC Mike: Thanks Mike. Glad you liked it!
I will once again have to copy you!
ReplyDeleteNice I like it :)
ReplyDeletewow very nice! I will have to try this out.
ReplyDelete@redmanphill: hahaha GO AHEAD! that's the idea of sharing! i would love to see your pics improved by a lightbox with a similar design to mine!
ReplyDelete@kirgan73, ashi: Thank you! As mentioned before, try it and share it! I would love to see that. And if you can improve your photography skills in the way, WAY better! ;D
Nice post, youre pic's allways do look very nice... I want a permanent one, for my mancave, i have no needs for transporting th photo booth to wherever. I'm planning to build one in wood with different backgrounds, LED lighting, and a removable "wall with a hole" for detailed fotography in wich case you want to avoid outside lighting. The whole thing would fit in a handmade (by myself) desk/working area for warhammer and other stuff related to modelling. I'm working on the paint booth at the moment... when my blog is up and running again, i'll make a WIP
ReplyDeleteKeep on thinking like you do, i really like the paint pot and tools rack you made, so here's a copycat in progress..
@Michal Van Varenberg: Cool! I'll be looking forward to your projects then! Glad you could use some of my ideas to make your projects. Tell me when your blog is running up again. I'm planning to do the same! It's been a big while since my last entry!
ReplyDeleteGreat job!
ReplyDeletehere you can see some cool pics http://theminiaturepaintingservice.co.uk/
;)
ReplyDeleteافكار جديدة فى التنظيف
تنظيف البيوت من المسئوليه الكبيرة التى لابد من القيام بيها و فالتنظيف من الاشياء الحيوية التى تساعد فى الحفاظ على المكان وتساعد فى الحفاظ على صحتك وصحه افراد اسرتك فاليك افضل الطرق المميزة التى تساعد فى الشعور بالراحه النفسيه والهدوء والسعى الى التخلص من اى تغيرات من الممكن ان تتعرض اليها من اهم ما تقوم بيه الاتى :-
شركة تنظيف الشارقة
شركة تنظيف شقق الشارقة
شركة تنظيف فلل الشارقة
شركة تنظيف منازل الشارقة
الاغطيه والمفروشات من اهم الاشياء التى لابد من الحفاظ عليها والقيام باعمال التنظيف باستمرار لانها من الممكن ان تؤدى الى التعرض الى الحساسية والامراض الصدرية فعليك ان تقوم باعمال التنظيف مرة على الاقل كل 6 اشهر والقيام بتنفيض الملايات والمراتب والتخلص من الاتربة ، بالاضافة الى القيام بتغير الملايات مرة كل اسبوع .
شركة تنظيف دبي
شركة تنظيف شقق دبي
شركة تنظيف فلل دبي
شركة تنظيف منازل دبي
• الارضيات ومشاكل التنظيف التى لابد من الاهتمام بيها فافضل الطرق فى اعمال التنظيف للبورسلين استخدام المياه والمنظفات المميزة المخصصه للارضيات ، الباركية شمع العسل وزيت بذرة القنب من اهم الاشياء التى تساعد فى الحفاظ عليها ضد اى تغيرات تتعرض اليها فاليك الطرق المجربة ( امزجى قليل من زيت الفنب وعليه معلقه كبيرة من الخل ومعلقه كبيرة من الكحول الطبى والبدء فى استخدام قطعه من القماش ومسح الارضيات والاهتمام باعمال التجفيف وانتظر النتيجه بعد دقائق)
• شركة تنظيف العين
• شركة تنظيف شقق العين
• شركة تنظيف فلل العين
• شركة تنظيف منازل العين
• الهواء الراكد من اكثر المسببات للرواح الكريهه فى المكان ومن اكثر الاشياء التى يحتاج الى تجددها فمن افضل الطرق هو القيام بفتح الشبابيك المتواجده فى المكان والقيام بفتح الشفاط الكهربائى وتغير الهواء المتواكد فى المكان ، او القيام بزيوت عطرية ووضعها فى بخاخات
Nice Blog. Thanks dear for sharing this interesting information with us and put your thoughts in this blog. Visit for best honeymoon packages for Maldives.
ReplyDeleteMaldives Honeymoon Packages
You will then be able to log into Windows with your default user name and password. putlocker Want to know more about network tools? Find more information on this
ReplyDeleteThank for very nice this sharing.
ReplyDeleteThank you very nice sharing.
ReplyDelete